LIFESTYLE
CPH
17/04/24 - now
HOW I BUILT MY DREAM BIKE
Short history of my CXC V3
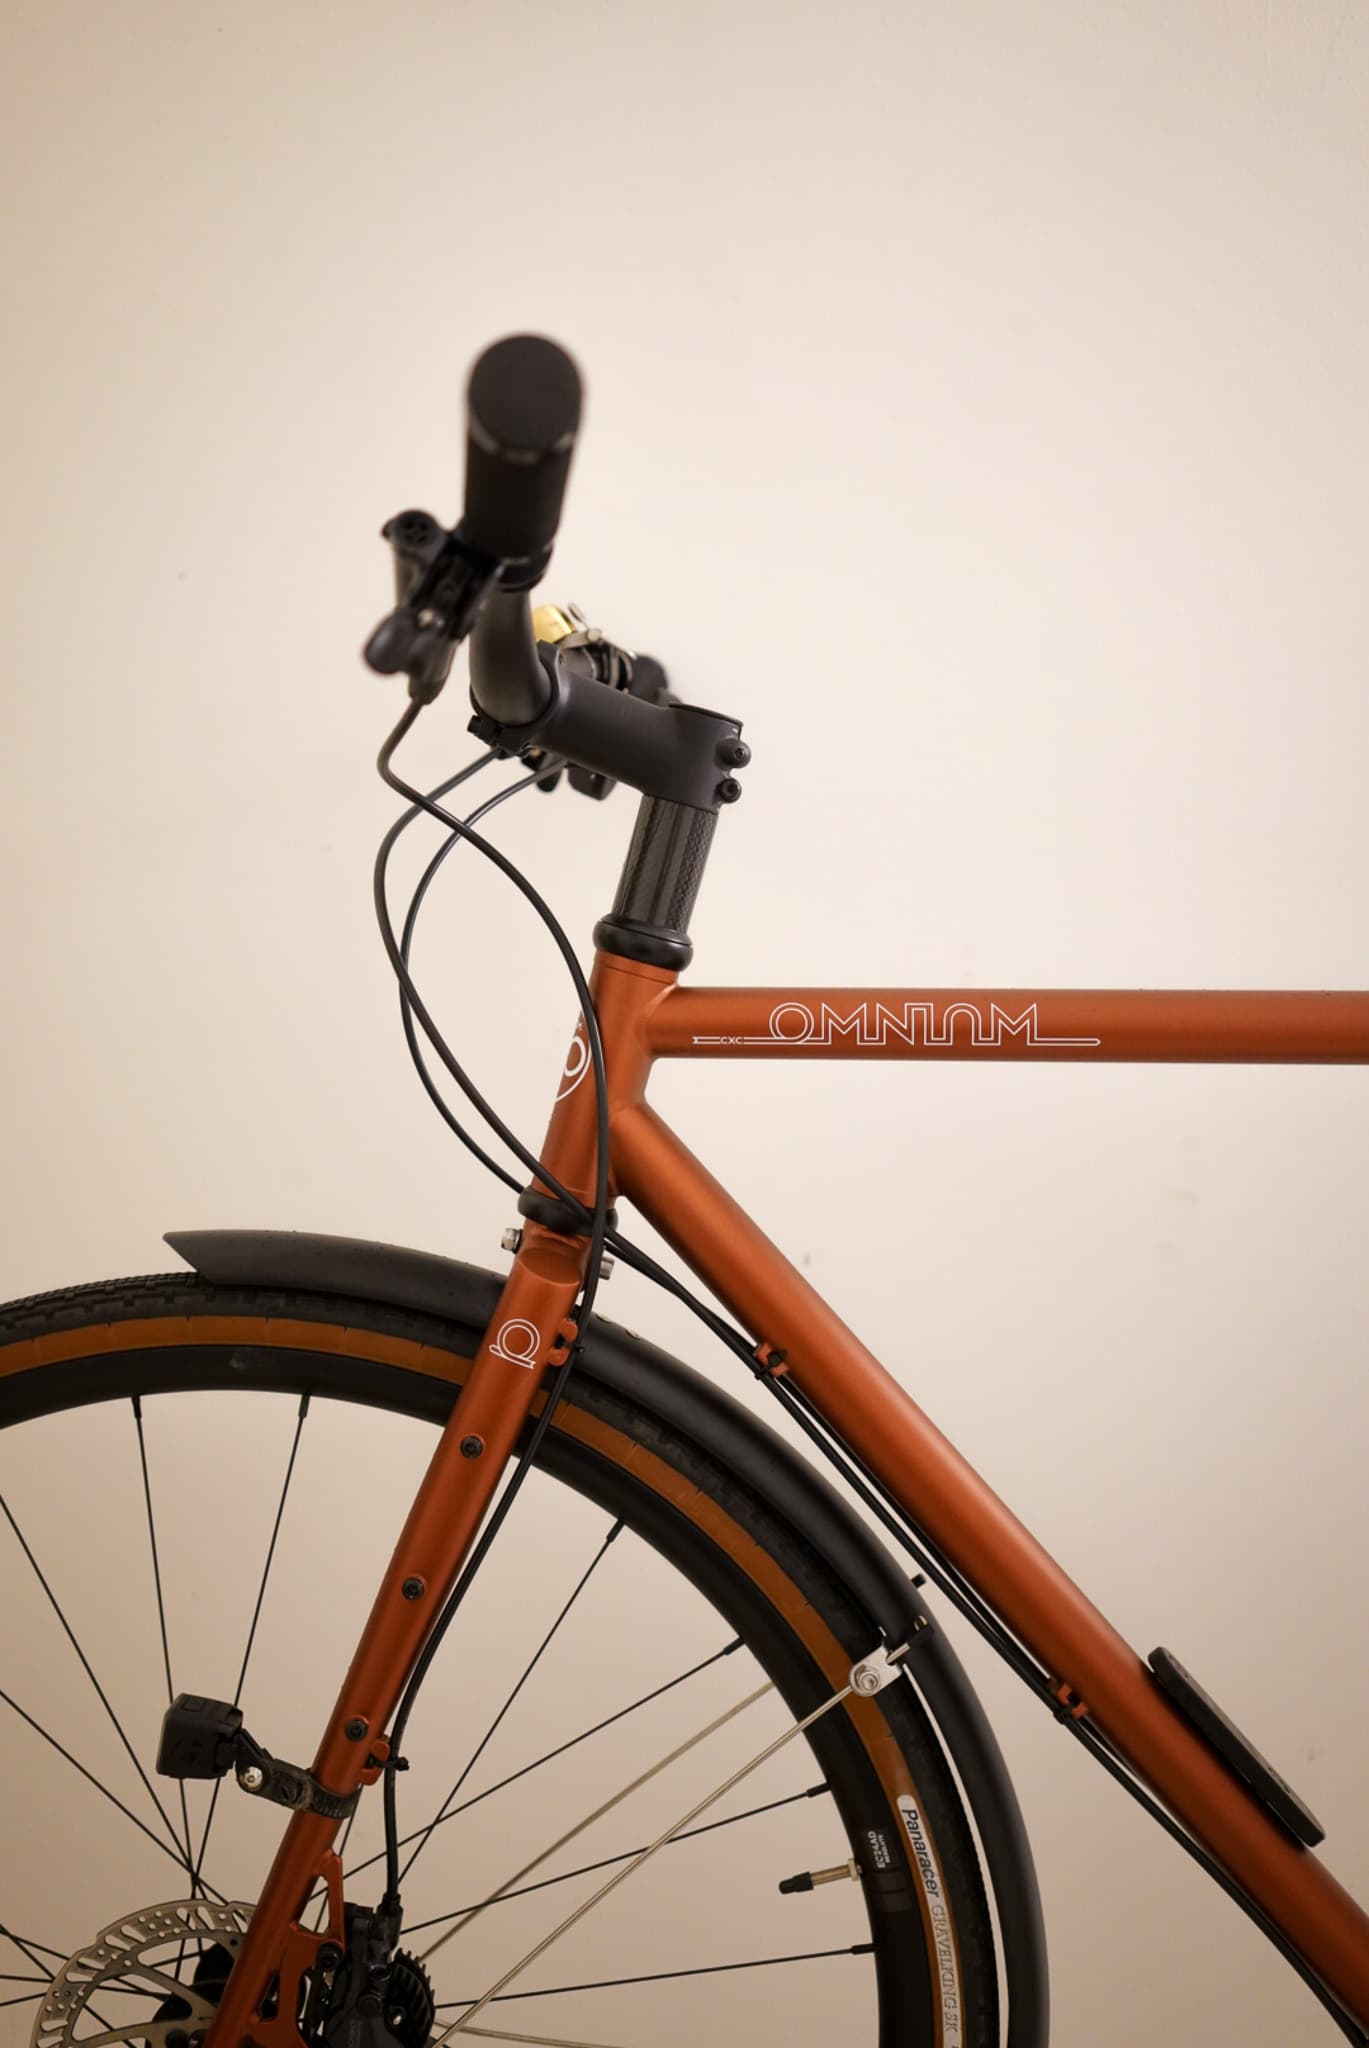
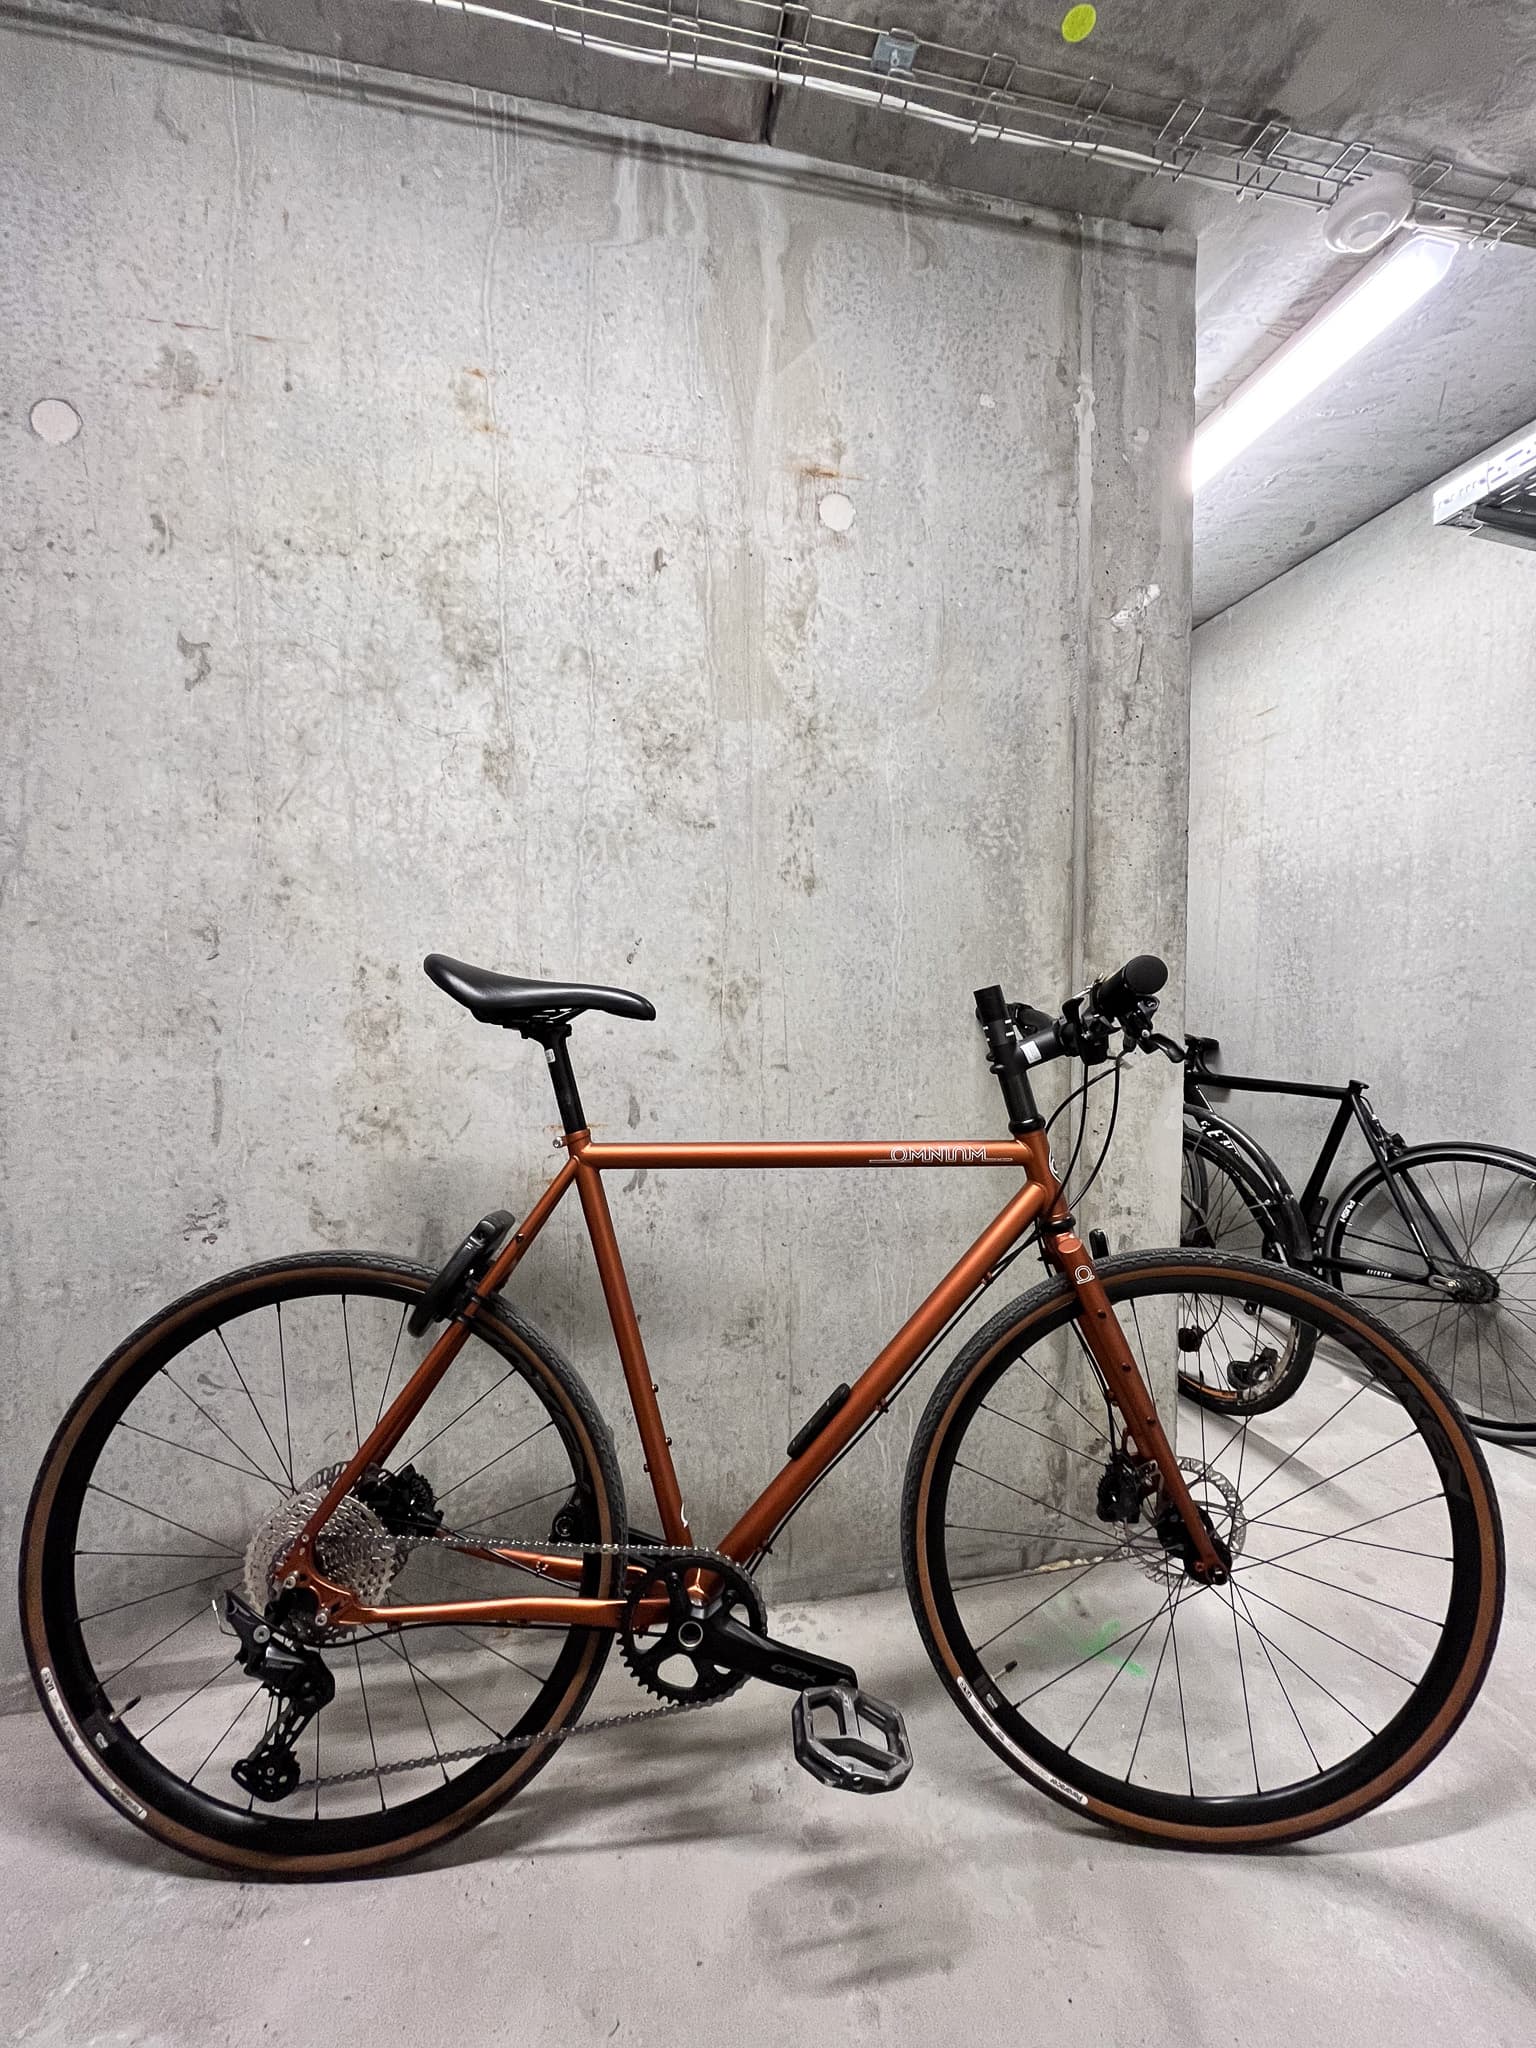
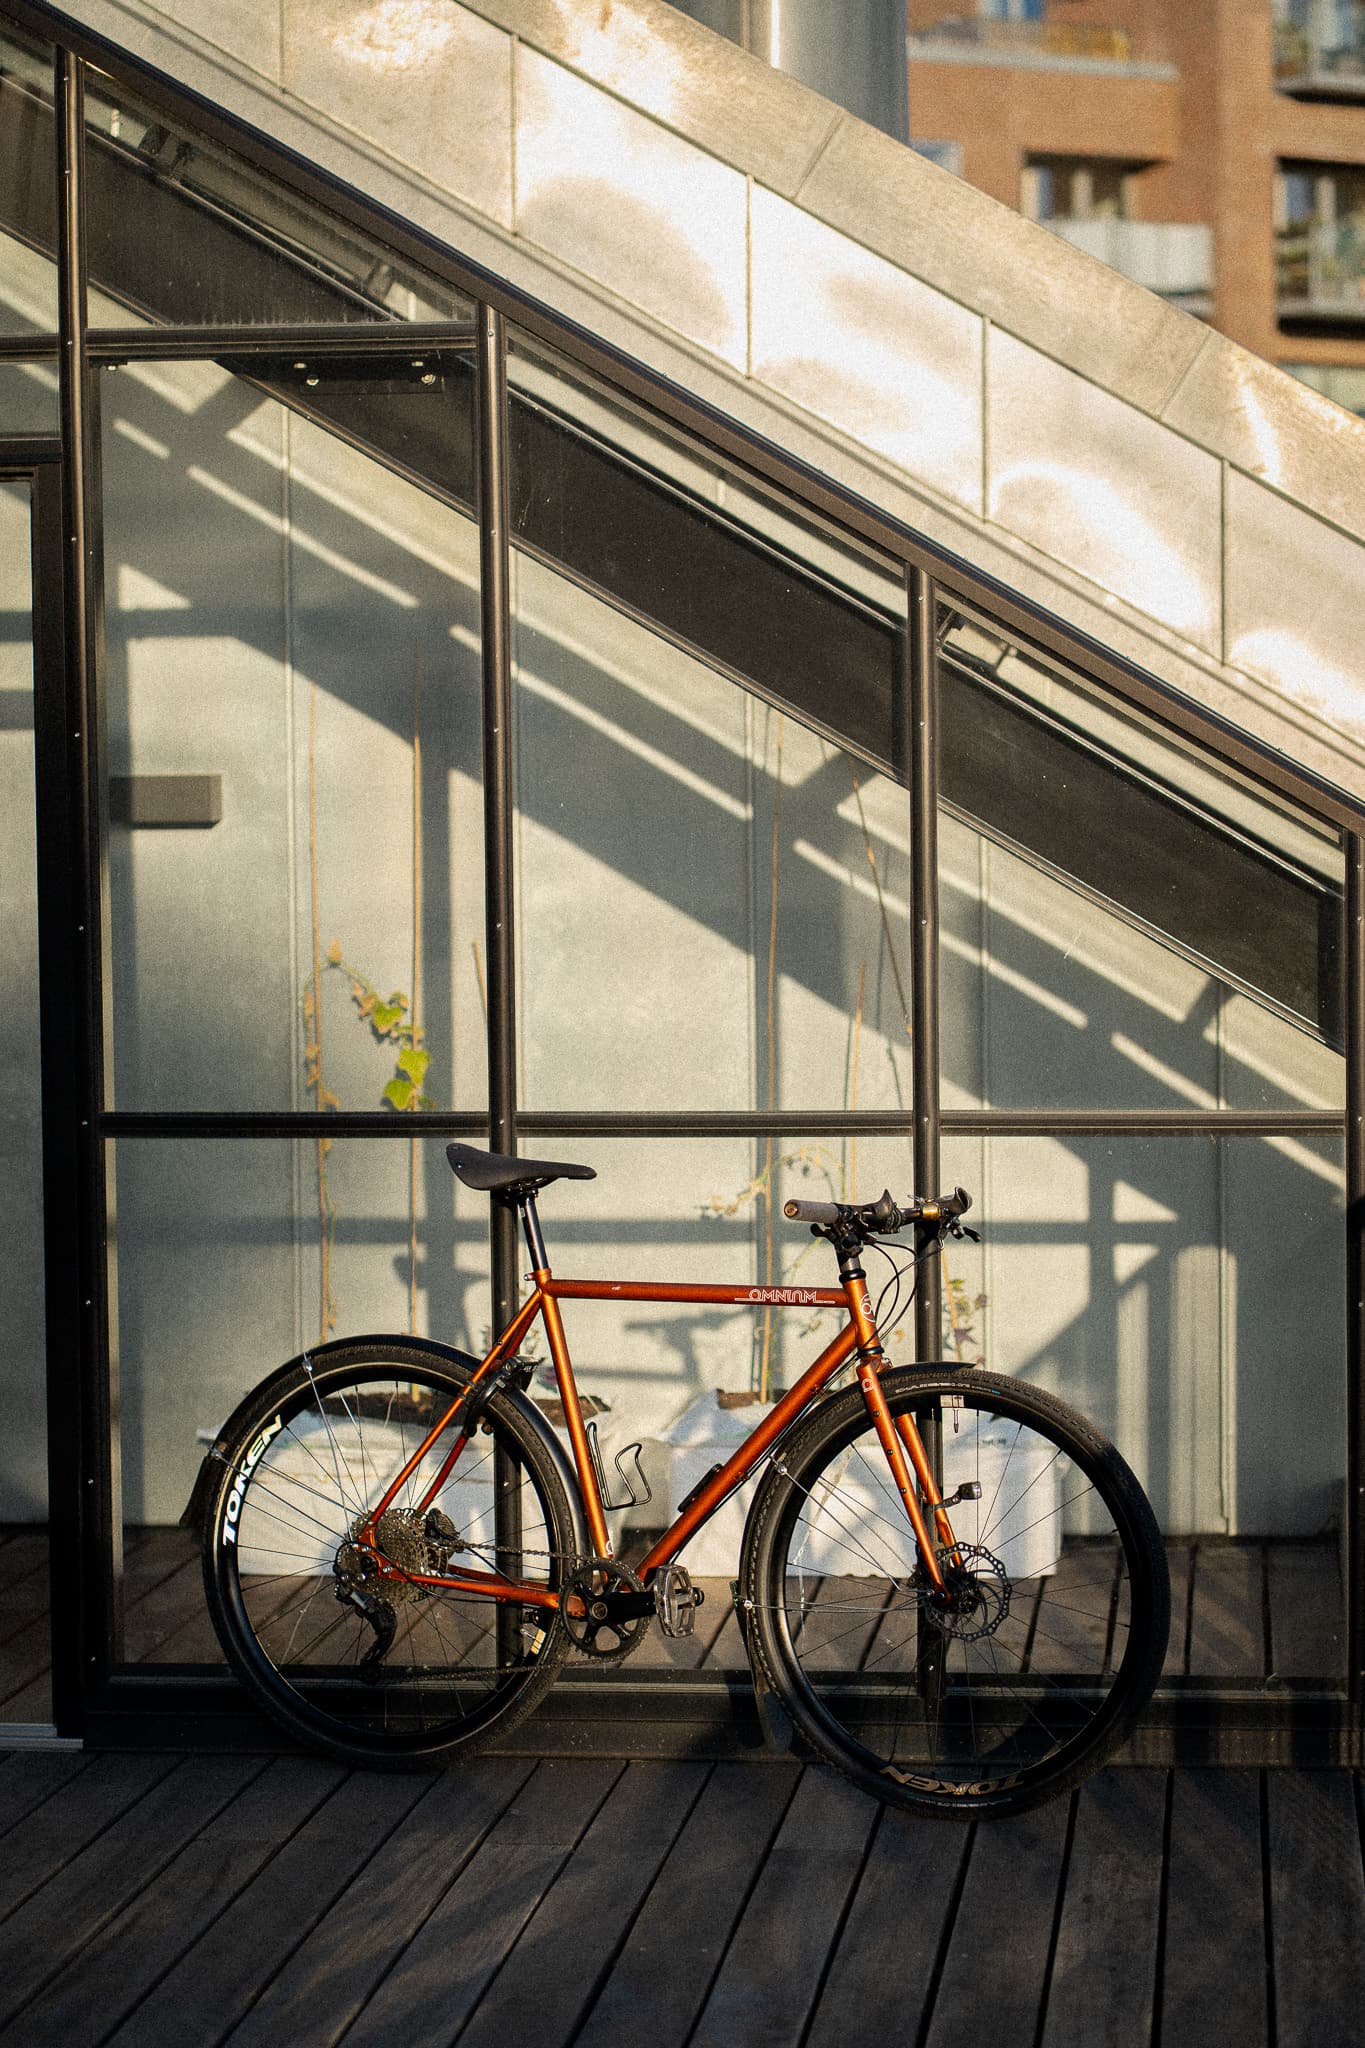
OMNIUM CXC
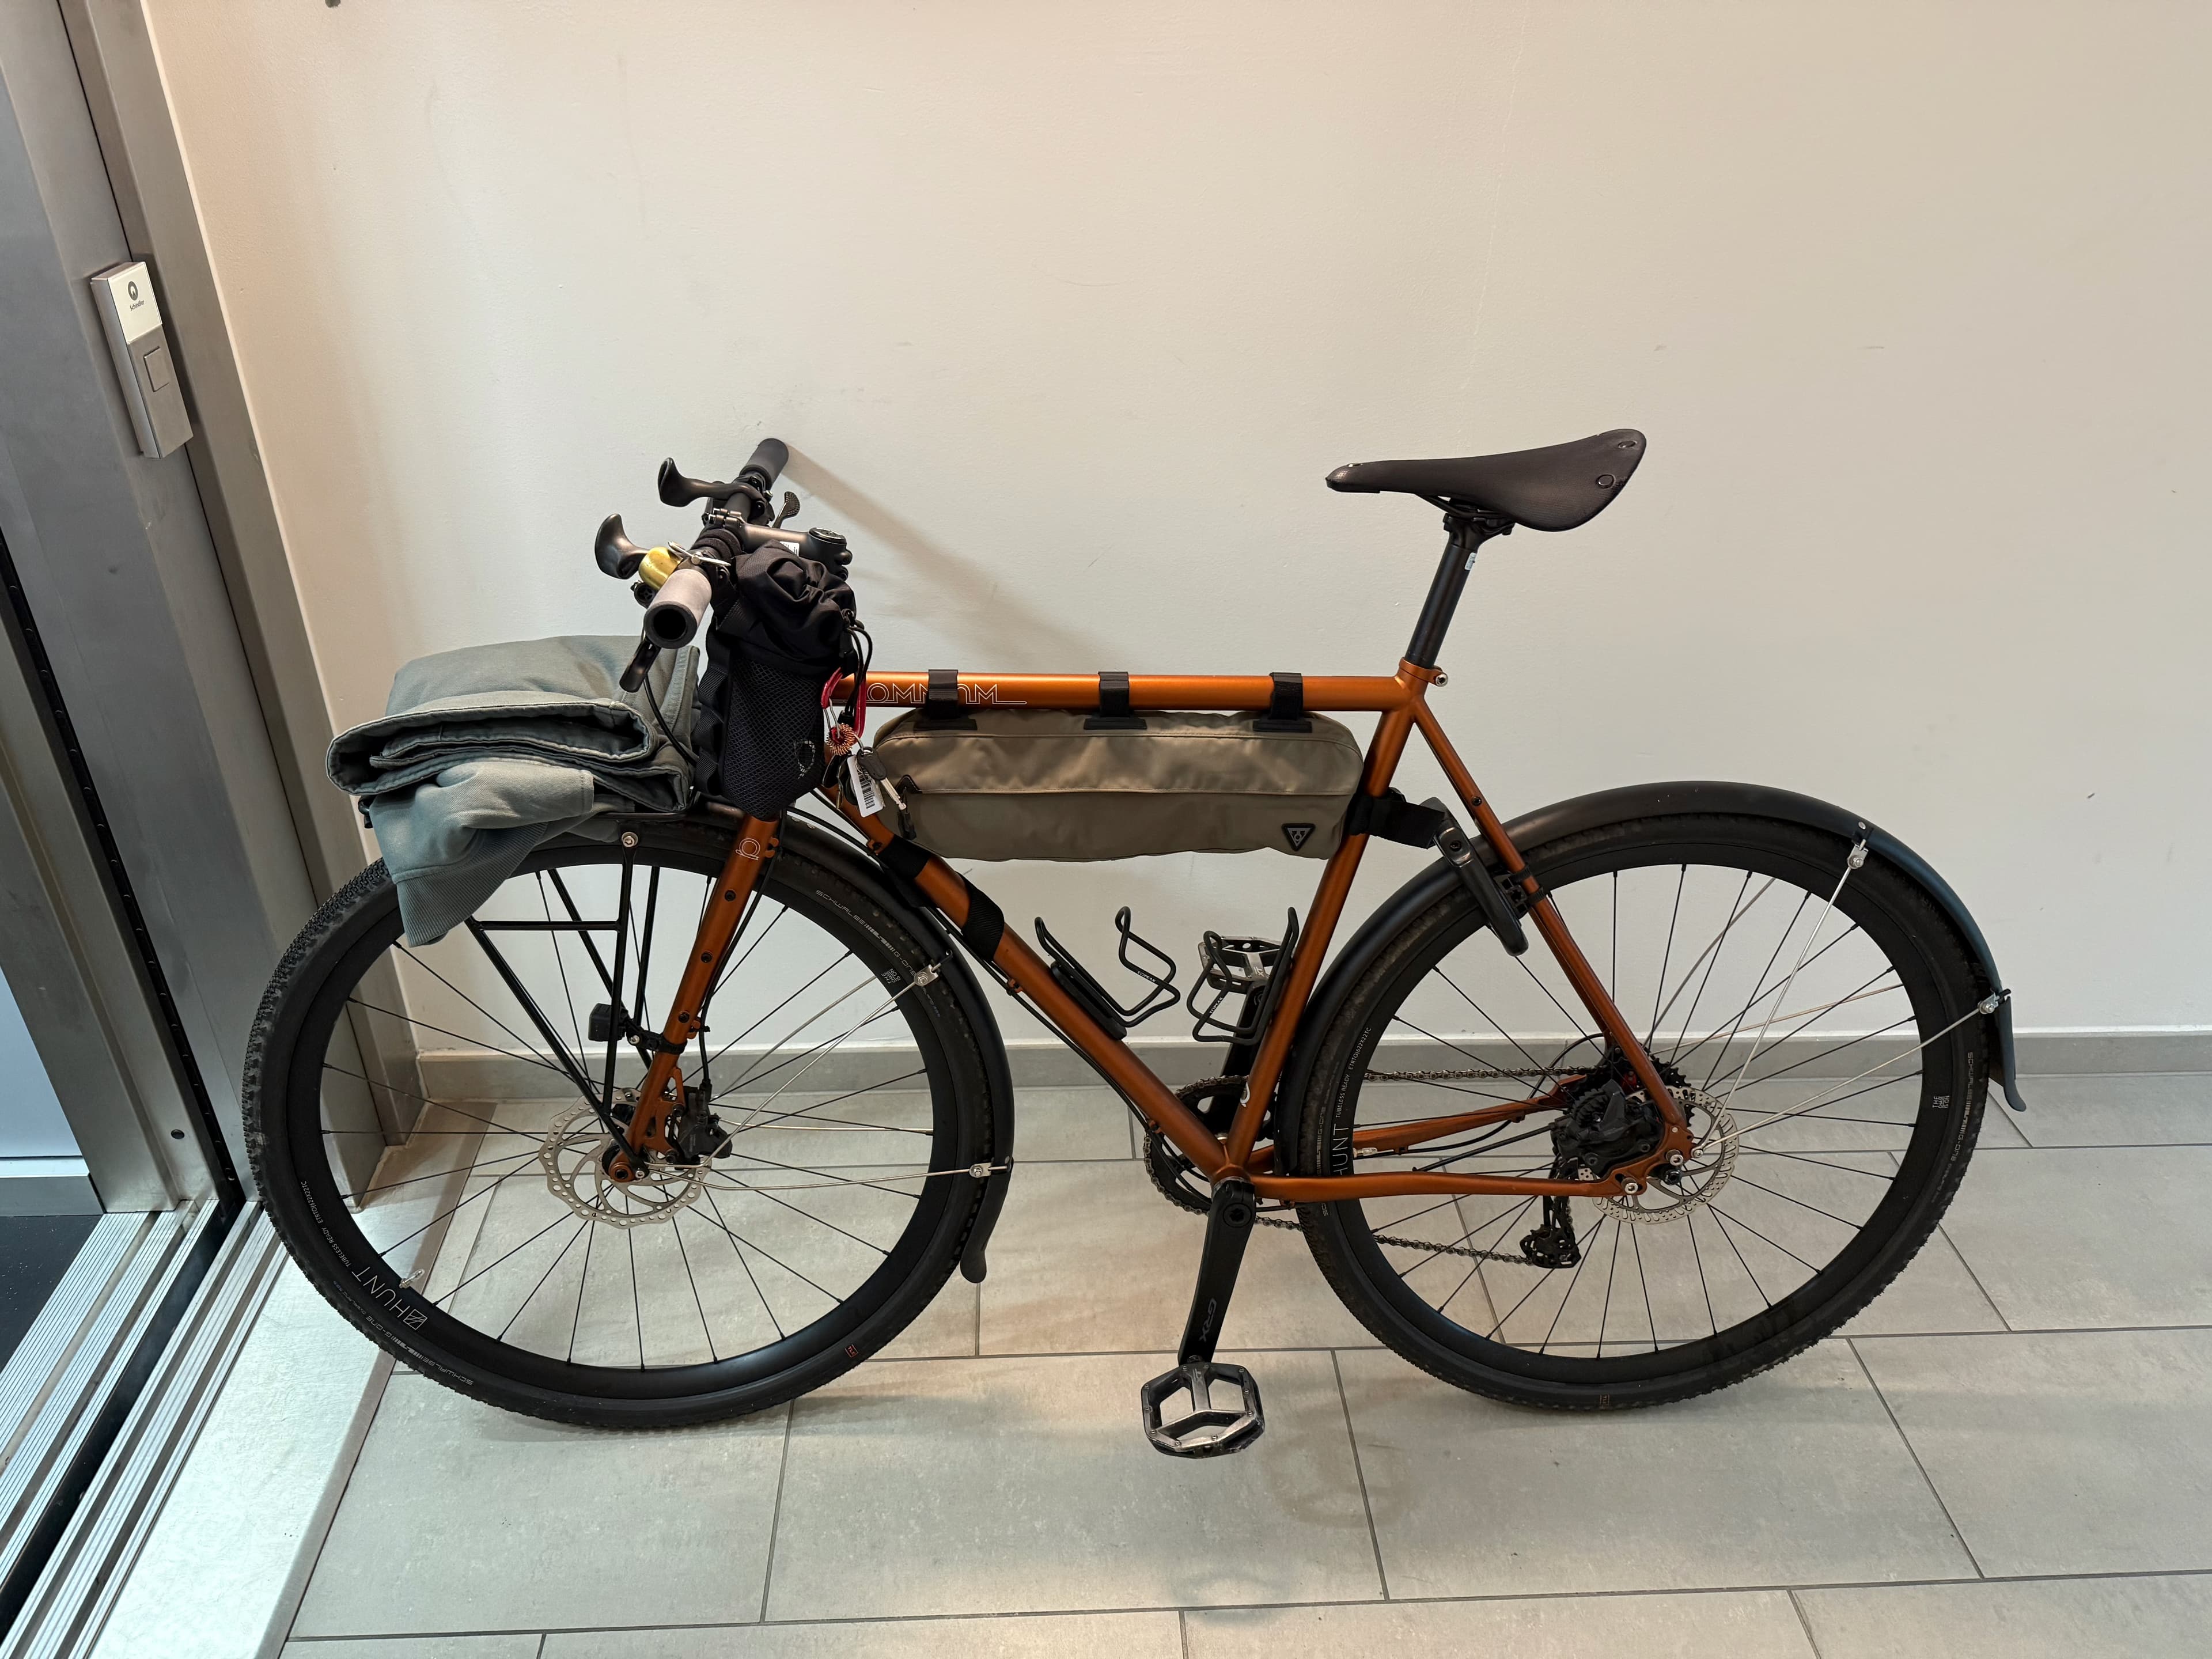
Omnium CXC V3. Bought as a framekit, built into a something that I quite like.
(Full speclist on the bottom of the post)
Written by Filip Malek | Started on 09/11/2025
There are many Omnium CXC's riding around Copenhagen, Denmark. Omnium, as a bike brand, has really exploded in recent years. They started (to the best of my knowledge) as a small custom frame builder in Denmark, making steel frames for bike messengers. Their original bike, the Cargo, is still one of their most popular models. What started as a bike messenger's workhorse is now more often seen ridden by regular parents as they drop off their kids at school. The hipster in me can't help but giggle whenever I see these parents riding what I consider to be a cool fucking bike — probably not knowing anything about it besides the fact that it's expensive and maybe blue(?).
But that's how it is — a brand becomes popular and makes its way into mainstream culture. People become more focused on having the bike rather than using it for what it's made for. To be fair, we see it everywhere: wearing mountaineering jackets in the city, hiking boots on the streets, or even better, approach shoes. I, for one, am guilty of it. What that does, however, is put more money into manufacturers' pockets — which, in turn, gives us better gear, so long as they reinvest that money into R&D.
HOW IT ALL STARTED
As these things usually go, I came up with the idea of building my own bike by pure accident — or disappointment, if you will. I had purchased an NS Bikes Crust in size M as a little gift for myself. It was supposed to be a workhorse of a bike that I would use, abuse, and reuse for years on end. For some strange reason, though, the frame size of the Crust was insane. The geometry was very laid back, and even though it was a 54 cm frame, it felt like an XL. I ended up selling it to a dad who was 195 cm tall — it fit him just fine.
Knowing me, I had to have a project. Not having one is usually quite terrifying for me. I started looking at frames after a friend of mine had her bike almost stolen. What I mean by that is that someone tried stealing it but didn't succeed — they ended up breaking her carbon frame in half instead. Her bad luck was kind of my good luck, because she decided to sell all of the components and use the insurance payout to buy a new bike. I ended up getting her wheels, which became the foundation of my new build.
"...and I knew that two most expensive parts are gonna be a frame and wheels so when she offered me an opportunity to purchase her secondhand gravel wheels, I started thinking..."
I always knew that building a bike was expensive, and I also knew that the two most expensive parts would be the frame and the wheels. So, when she offered me the chance to buy her secondhand gravel wheels, I started thinking. I had the wheels, I had an idea of what frame I wanted, so now it was time to start building everything up. I went to the store in Copenhagen and decided to go for the Copperhead color in size Medium. I had ridden both Medium and Large, and even though the Large felt a bit more stable, it just wasn't as fun to ride. One thing about the CXC is that it's a very playful bike due to its narrow wheelbase. So, I bought the frame in size Medium, and I already had wheels that fit the tires and discs — time to get everything else. A full list of parts will be in the footer of this article.
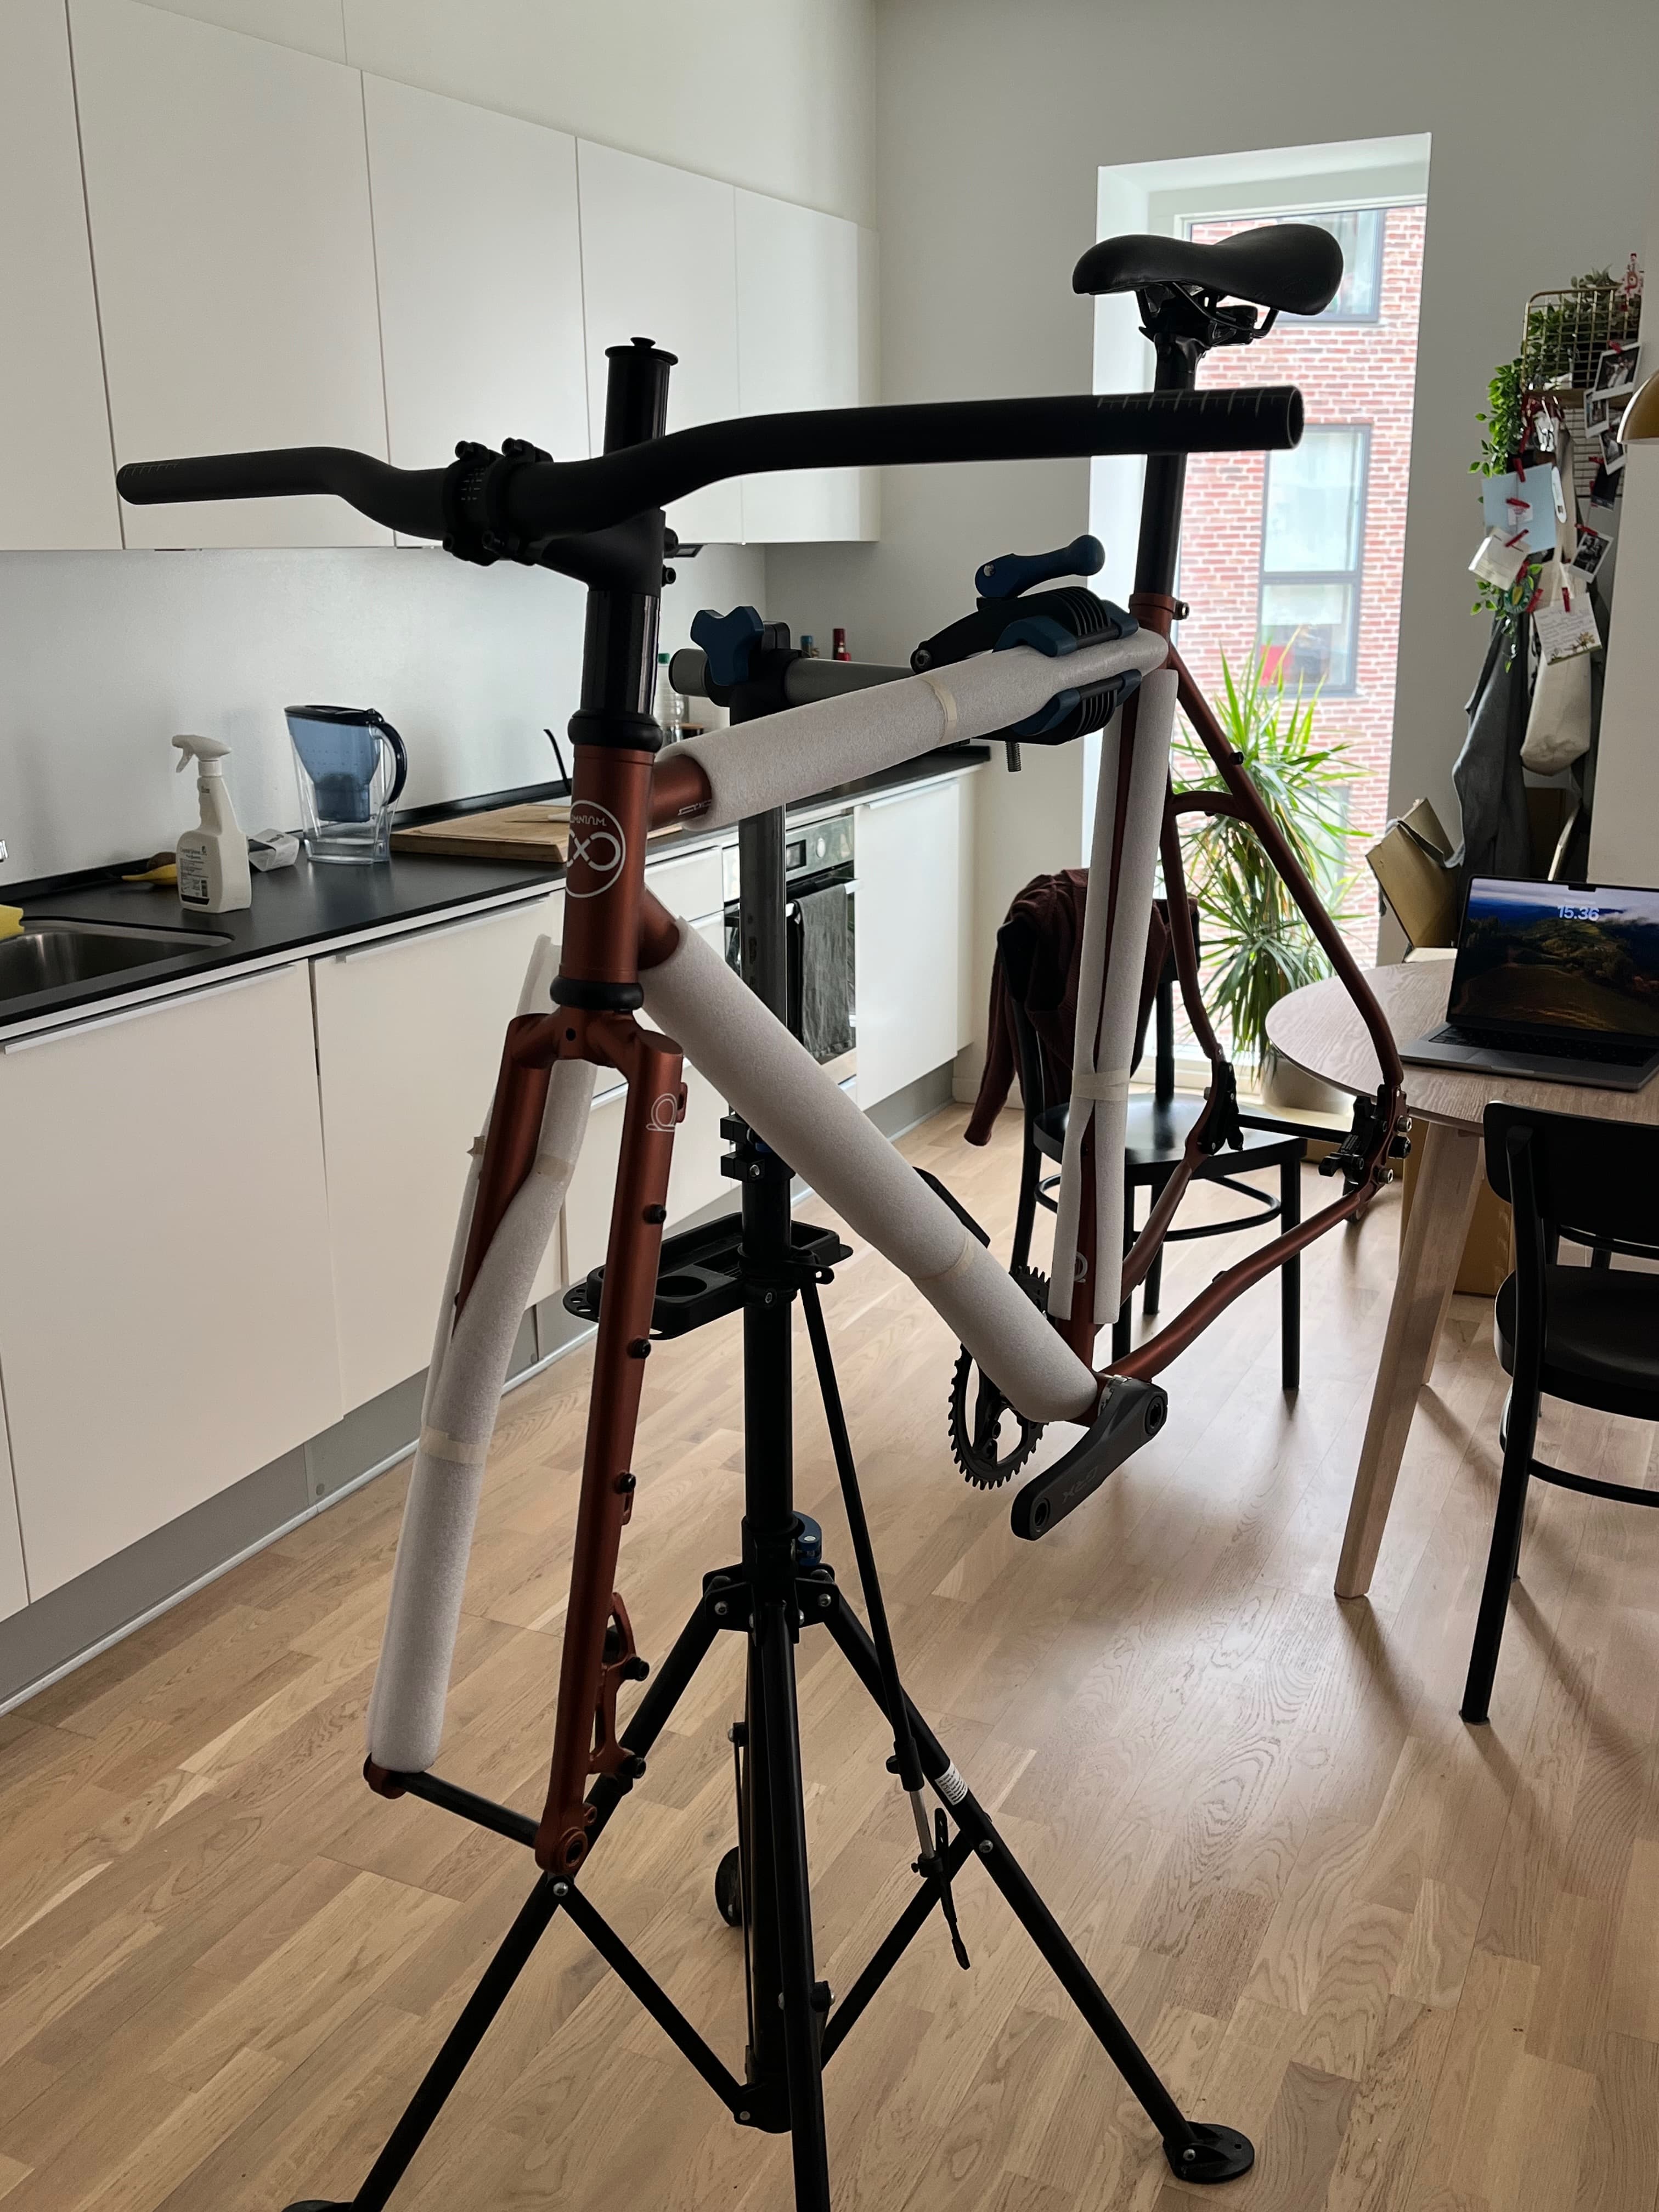
Below, you can see the initial build — from the start in my living room with all the parts laid out, to something rideable (note the fork chimney — I used steam to go quicker).
WHY THE SPECS?
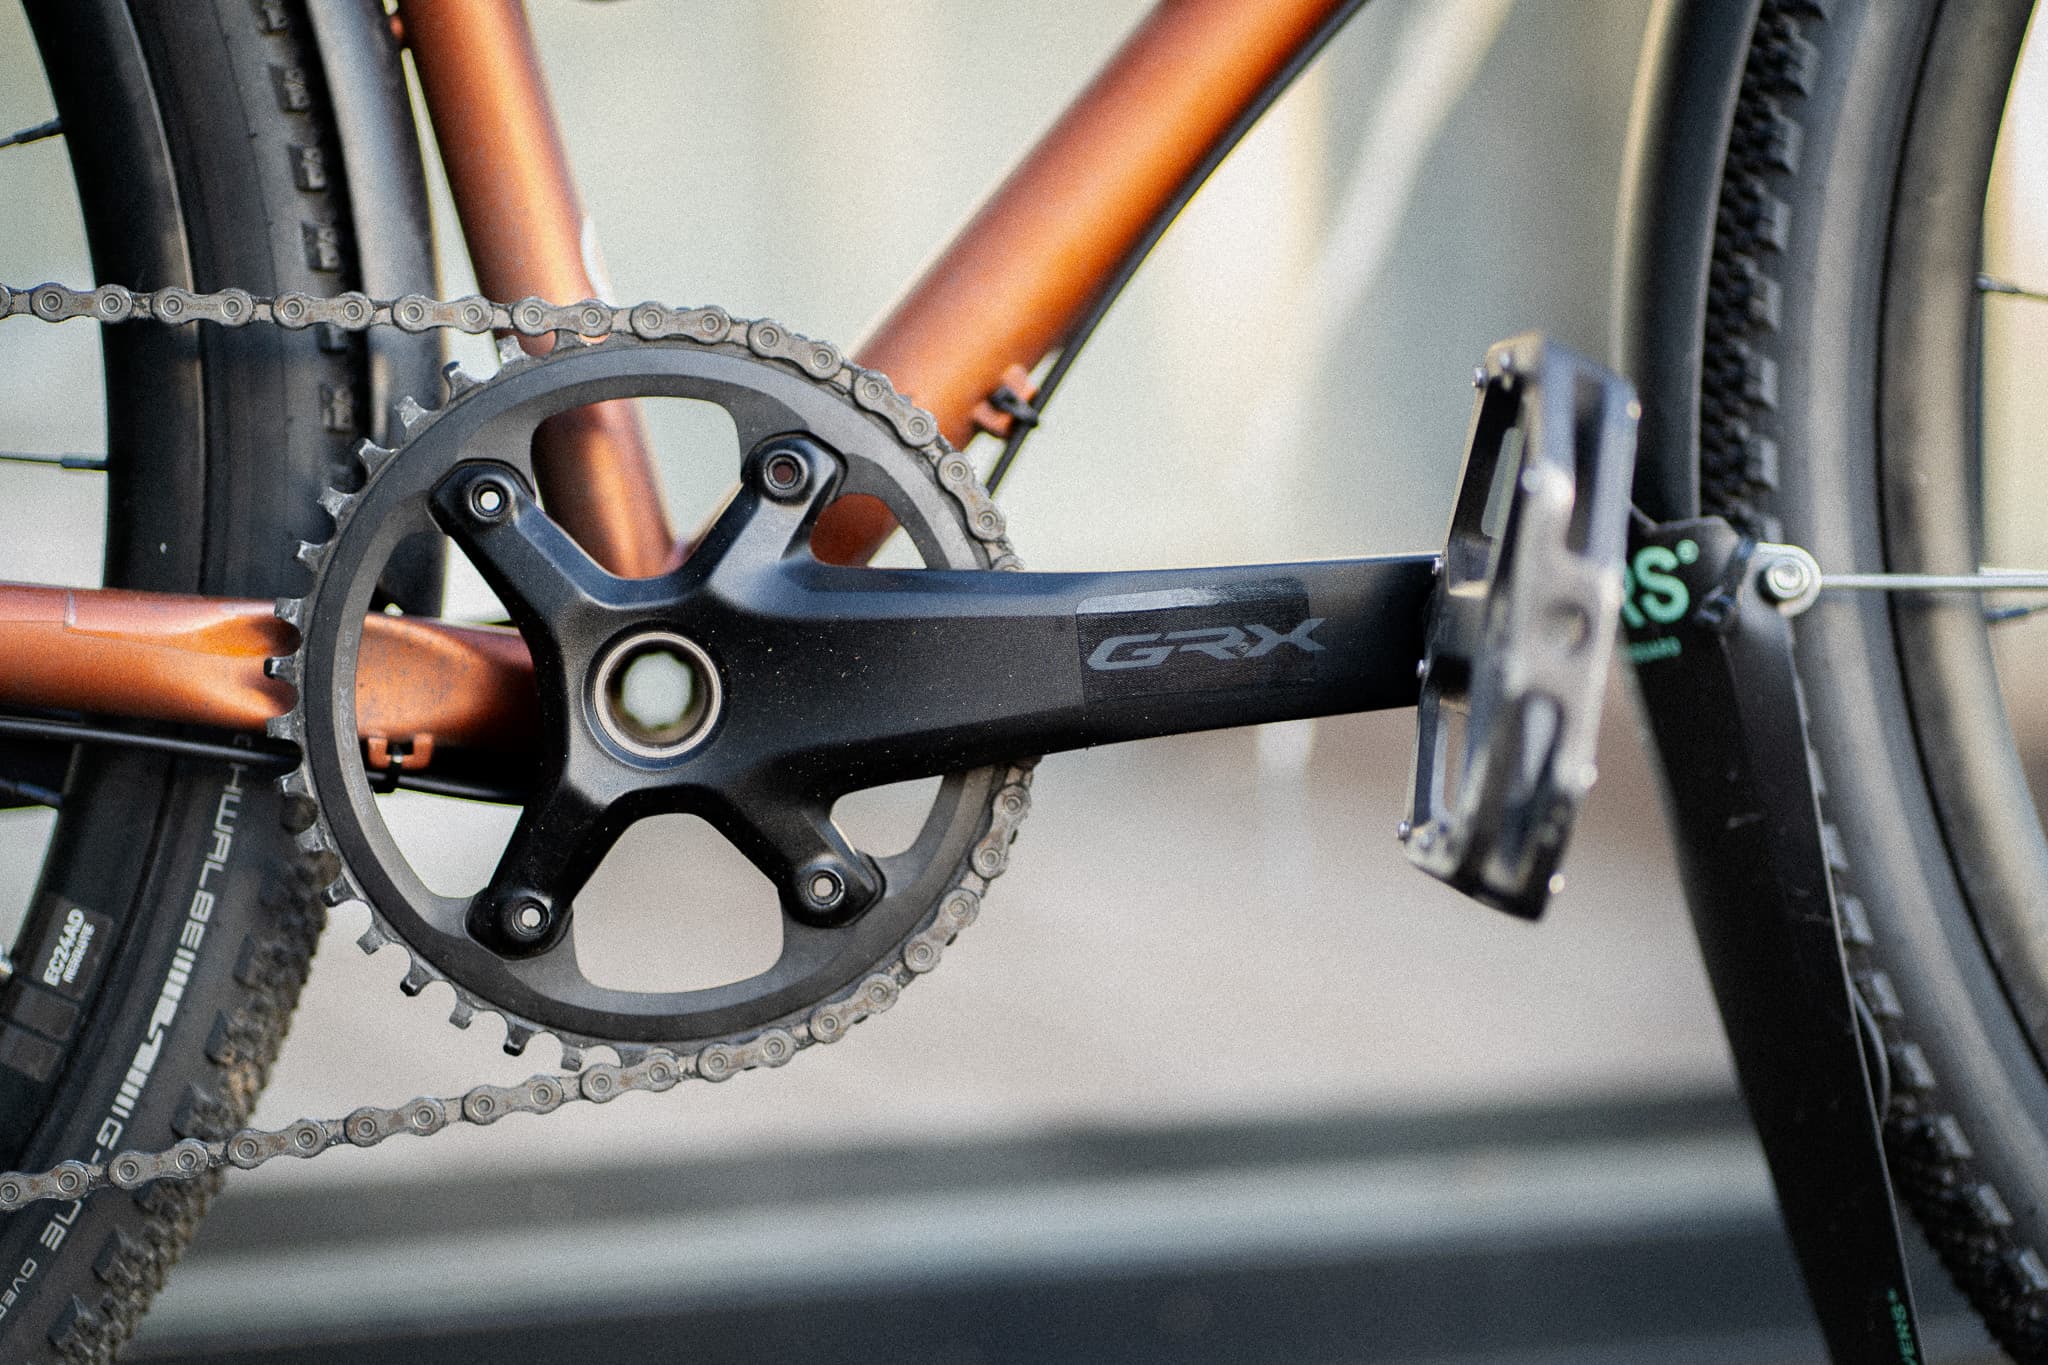
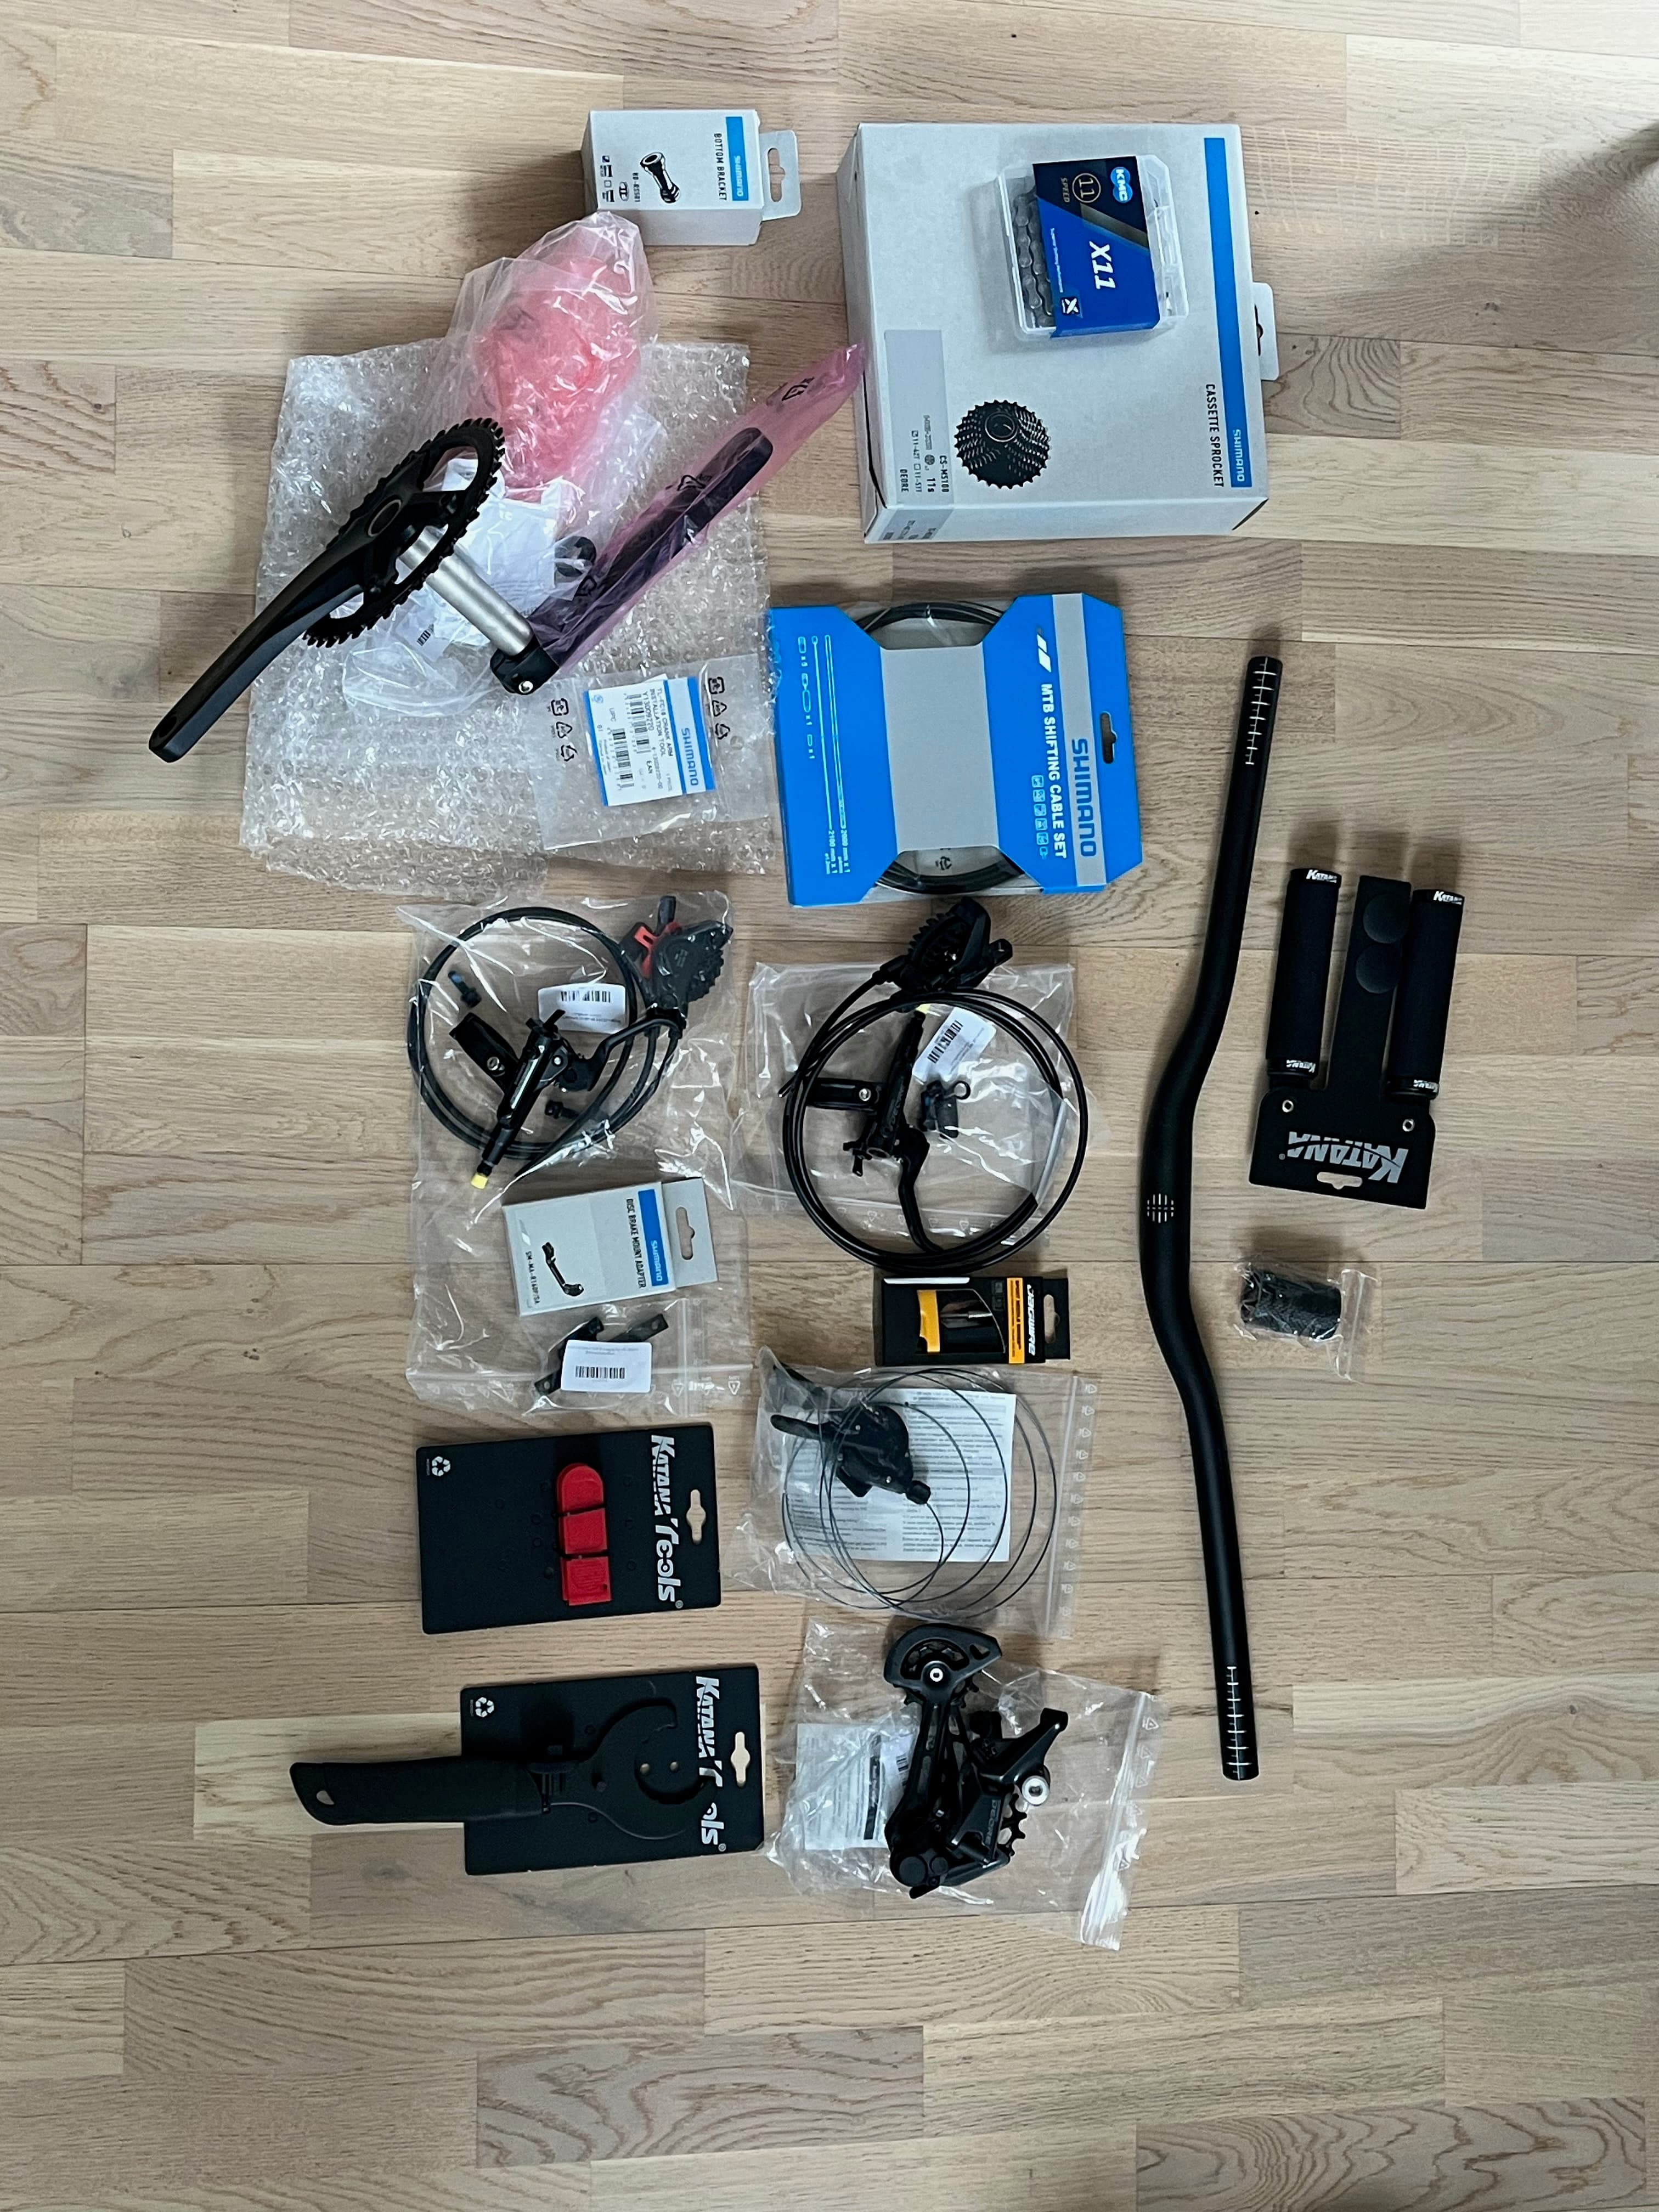
Initially, the goal was simply to have a rideable bike, period. I didn't care too much about fancy parts, since I knew those could be upgraded later on. I got most of my parts from the Bike-Discount webshop, and a lot of them were brand-new but intended for bike mechanics — so, without original packaging. That made them really cheap. They were still brand-new parts, but instead of coming in a box, they came in a ziplock bag with a barcode sticker. I went with GRX cranks, as I knew those were something I wouldn't want to change later on. I also went with the cheapest 68 mm Shimano bottom bracket. Bottom brackets scared me — the whole Q-factor and indexing thing was a mystery. I just went with what I could find that worked and hoped for the best. I was very lucky (and blessed) to have a colleague who just happened to be a Swedish National MTB team mechanic — shout-out to Selby! He helped a lot with part identification and figuring out what would fit and what wouldn't.
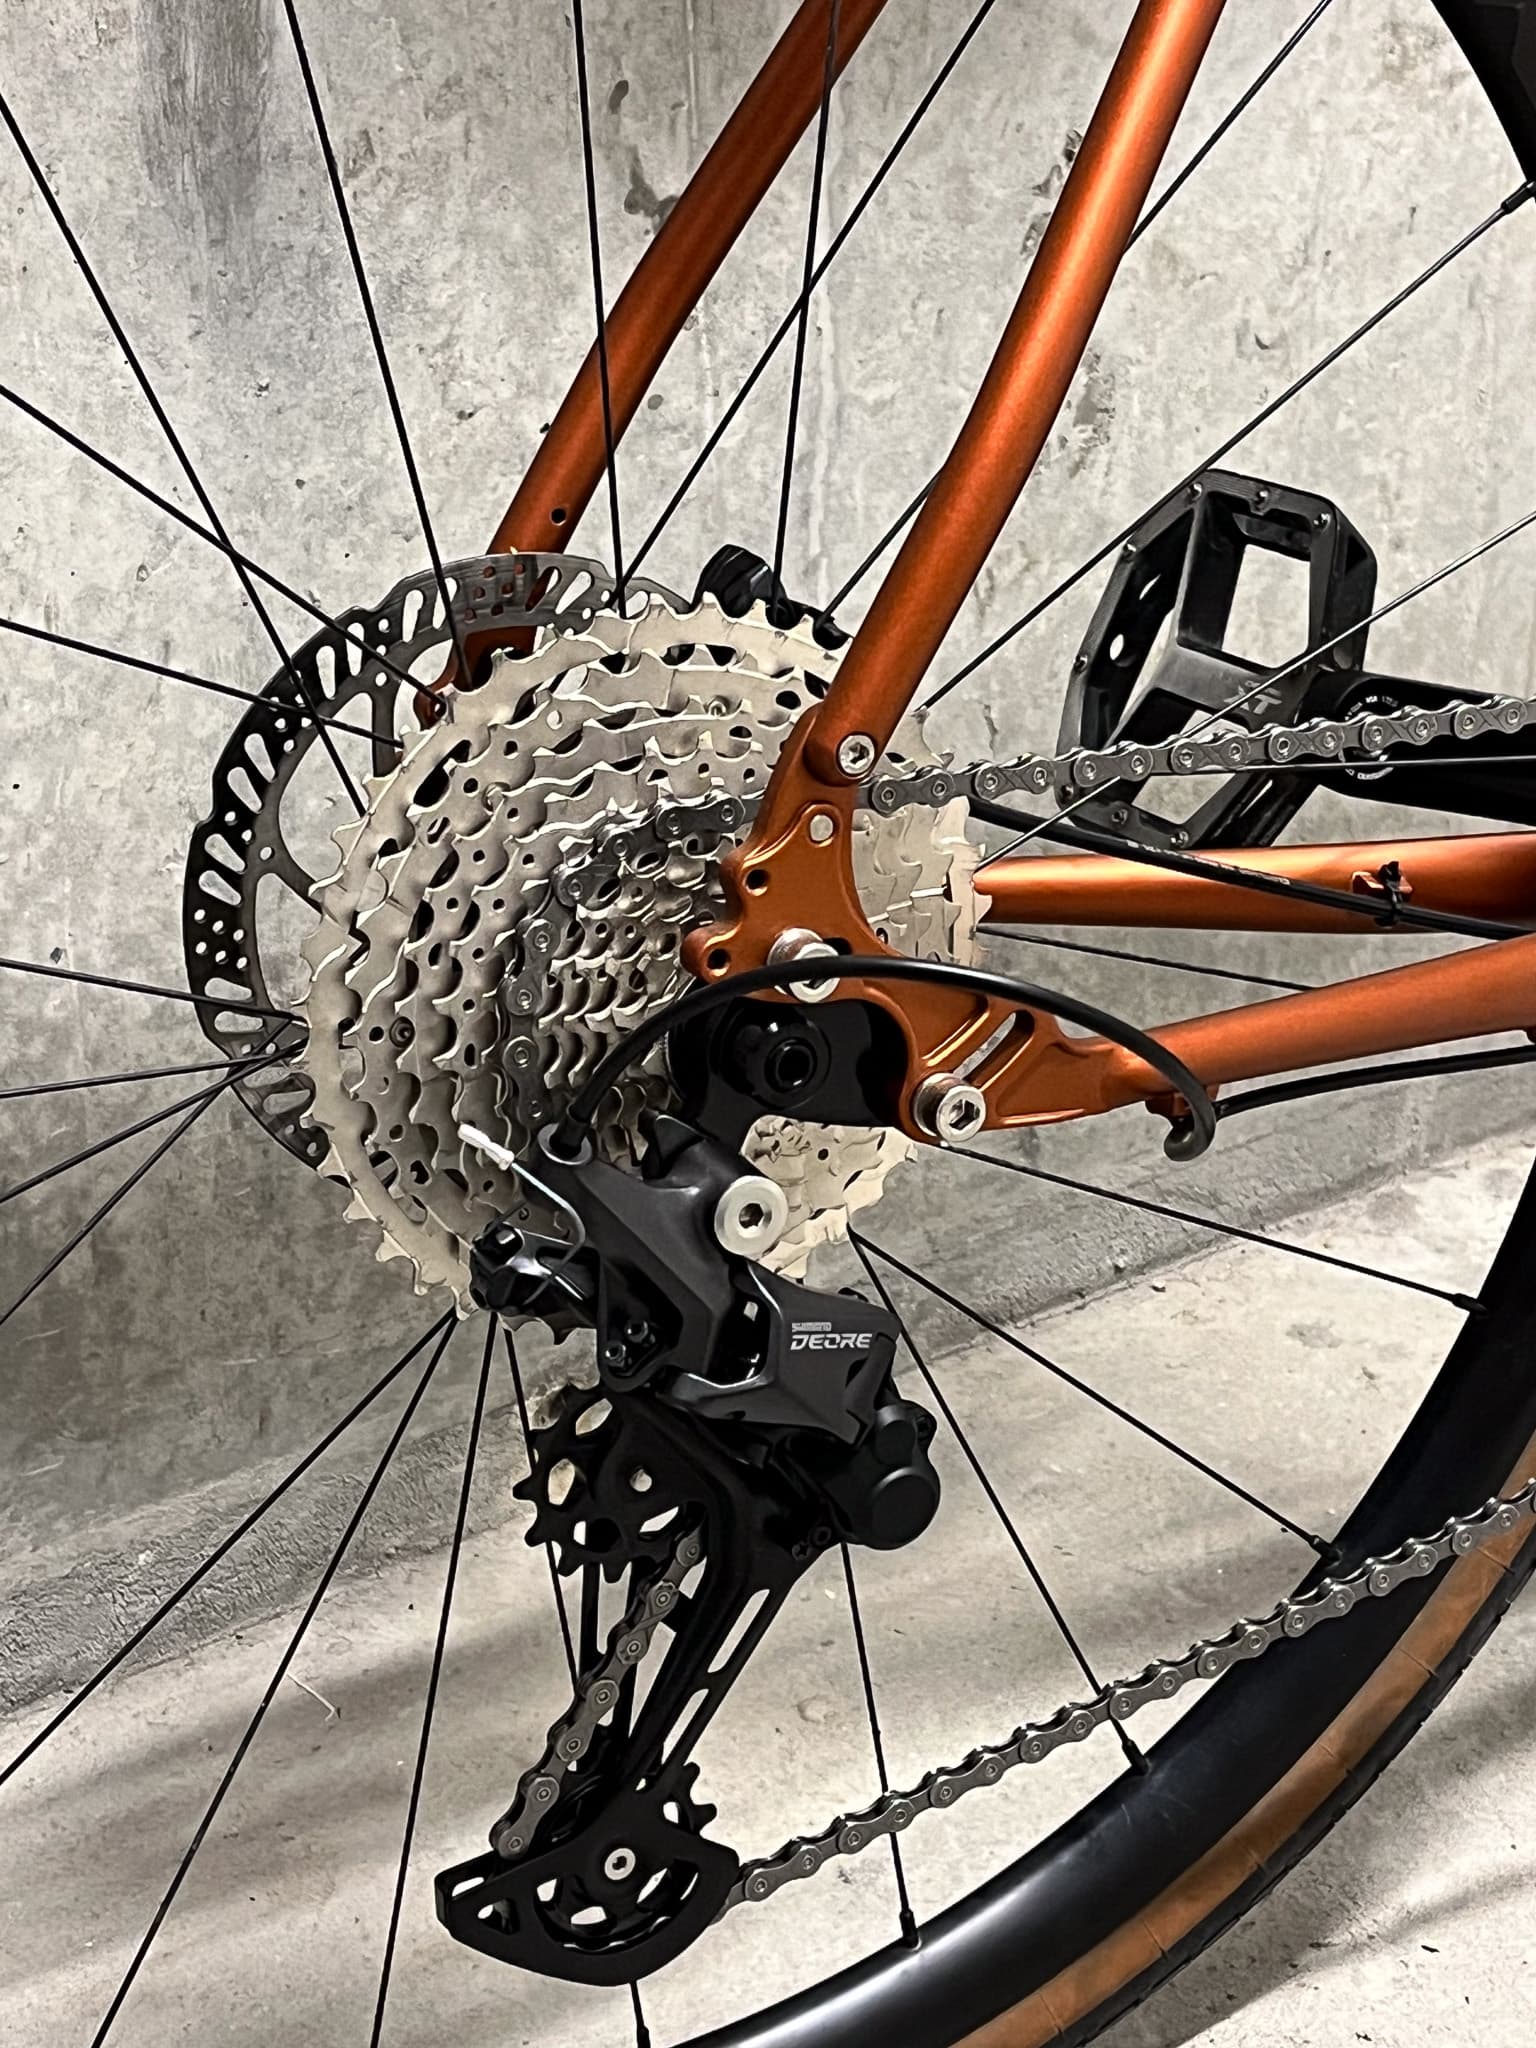
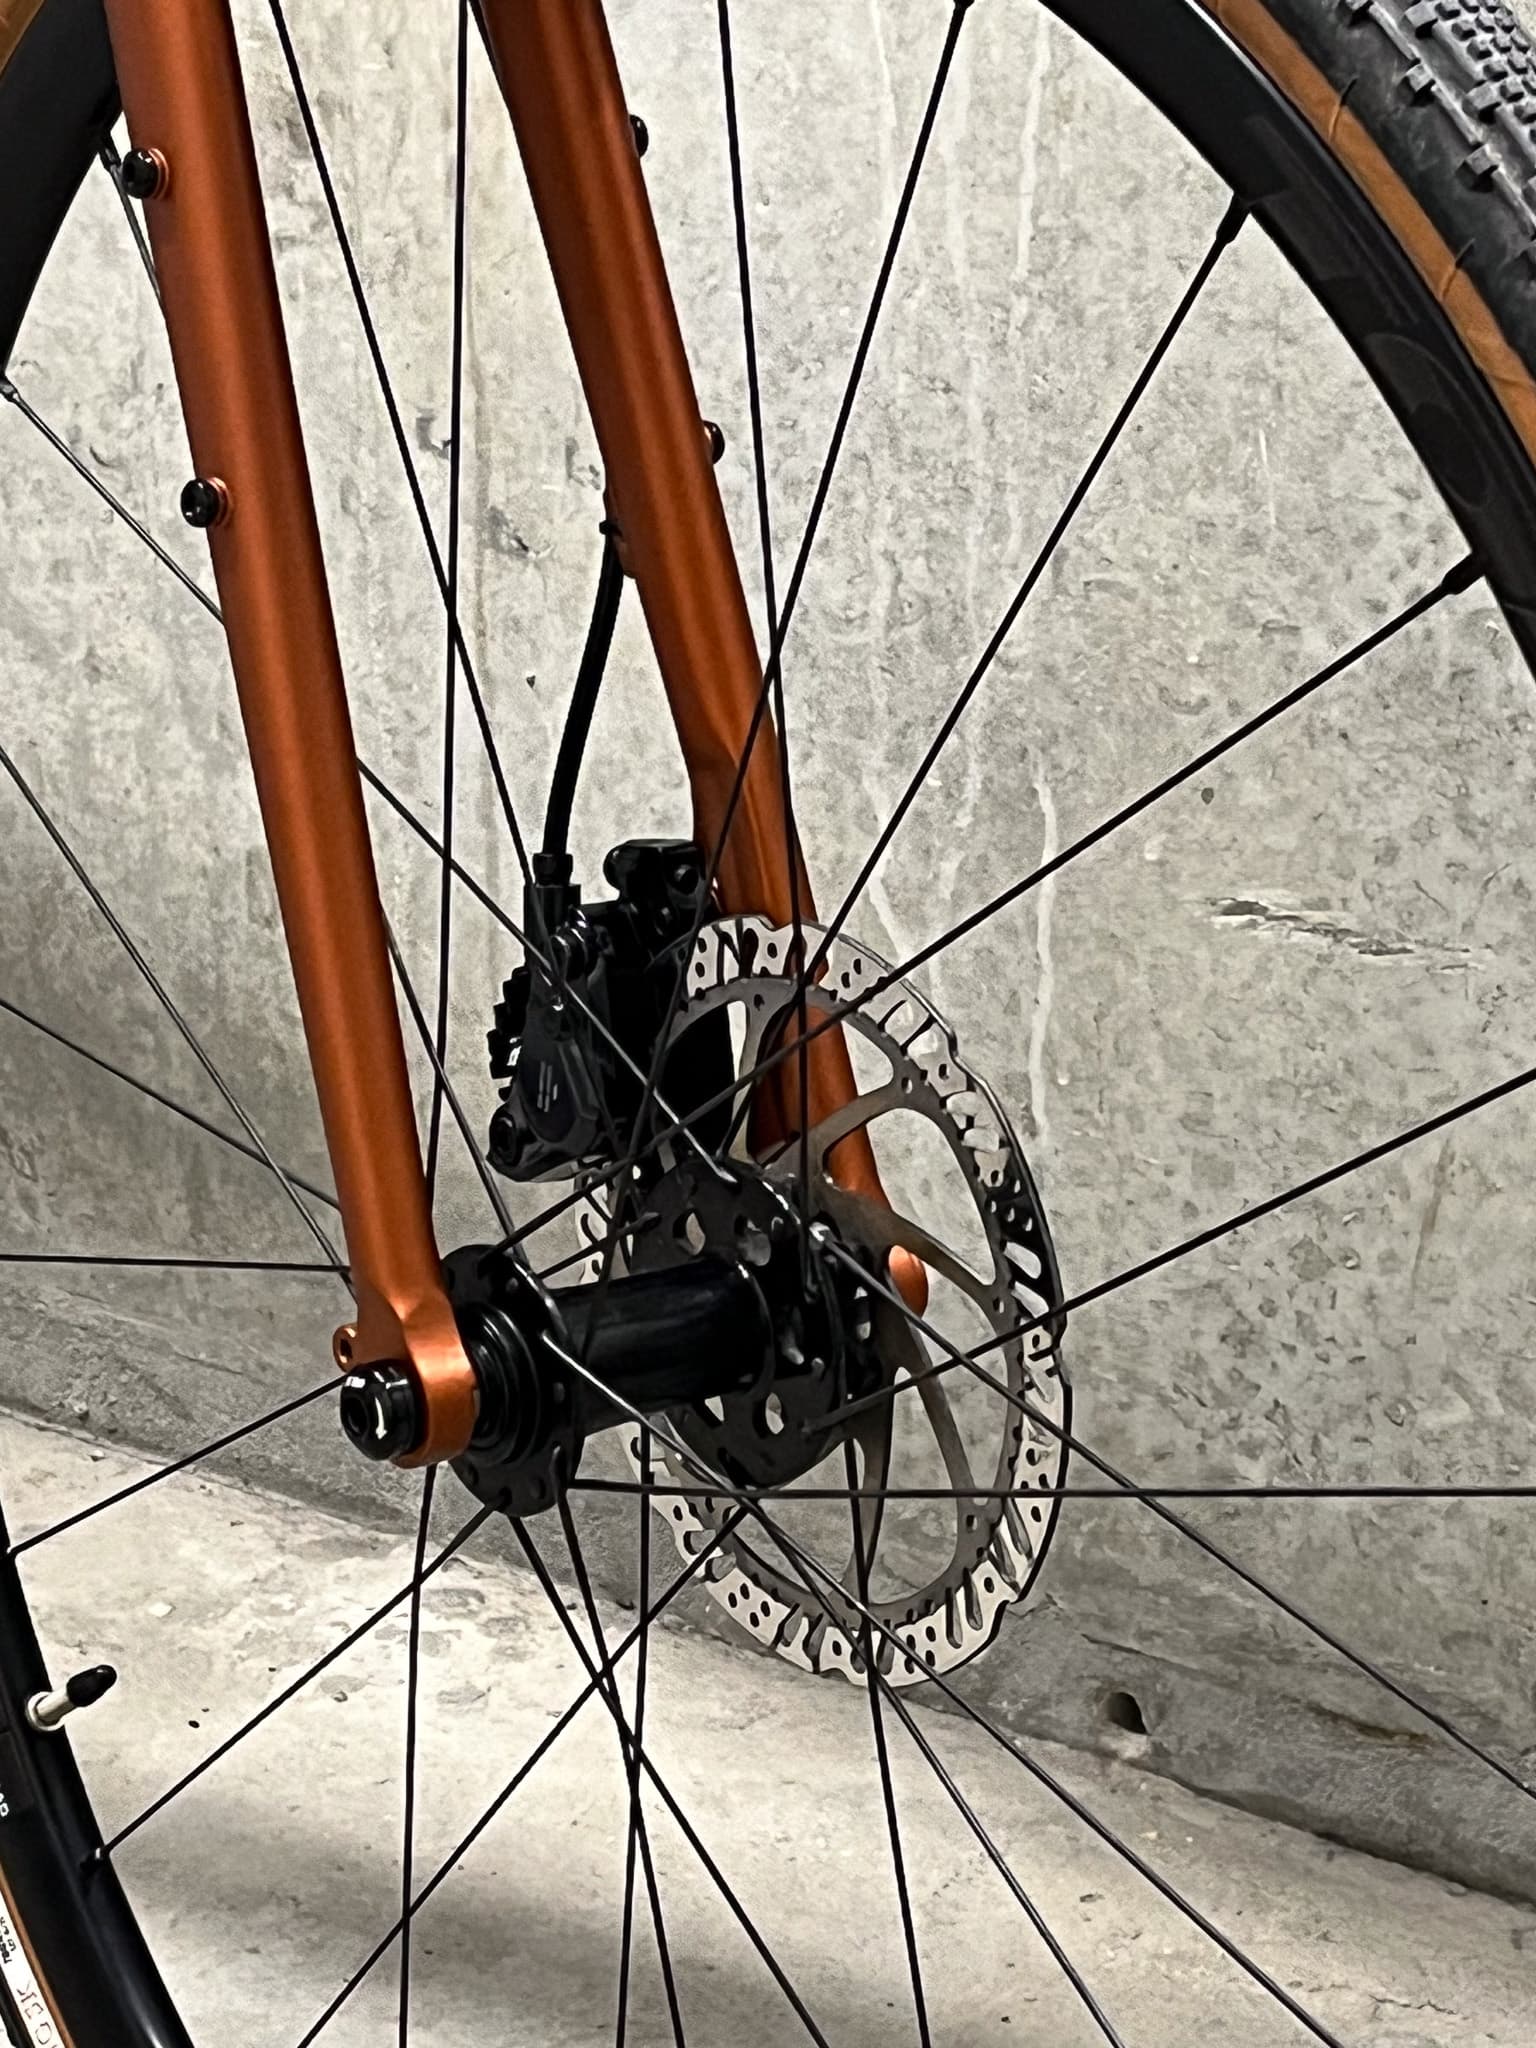
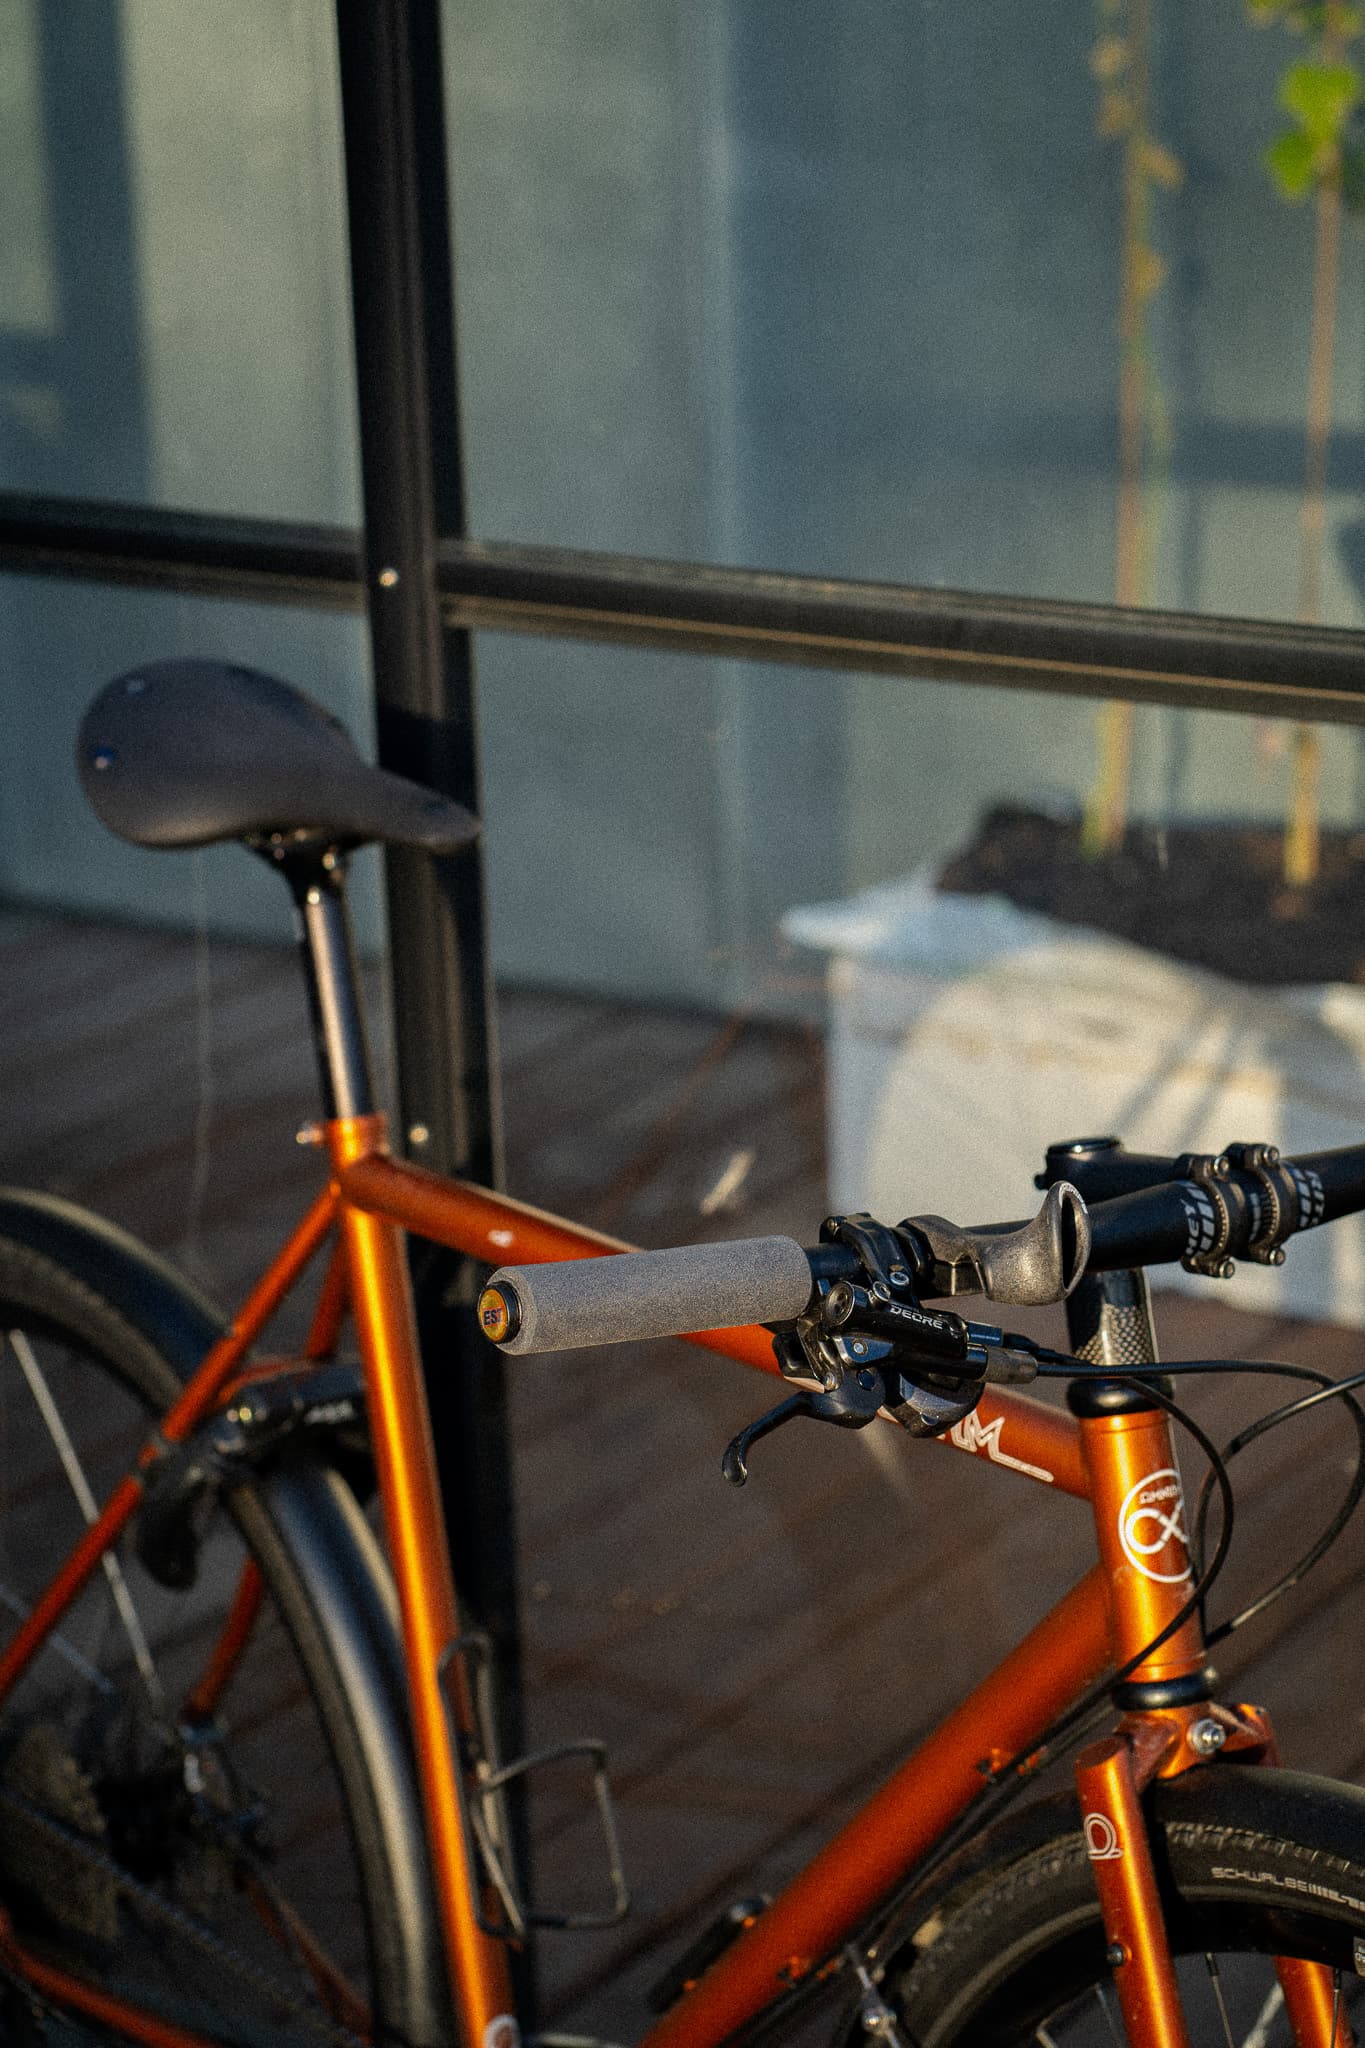
For the drivetrain, I again went with cheap but functional. I made a mistake and got an MTB derailleur intended for 11-51 cassettes only — the Shimano Deore M5100 rear mech. For this, I blame Omnium, LOL. On their website, they list this specific mech as the default one that comes with their CXC Shimano builds. What I actually needed was the 5120 model, which works with my cassette range of choice — 11-42T. Luckily, these mechs are dirt cheap on Bike-Discount (about 20 euros for a brand-new one). I got the 5100 to work — that's what you see in the initial images — but I swapped it for a 5120 soon after, which shifted much nicer and smoother. Let's talk brakes. I wanted decent hydraulic brakes — nothing too technical. I live in Copenhagen, and it rains here often. Having a closed, strong system seemed like a no-brainer, so I went with Shimano's entry-level MTB range, the Deores. They have cool-looking one-finger levers, a servo system, fins on the brake pads, and overall, they just look cool. If they can work for MTBs, they can work for me too.
"Invest in a better component if you can swing it!"
The wheels were Token EC24AD, which came pre-installed with Panaracer GravelKings in 32 mm (without extra puncture protection — I had maybe one flat in a year of riding them) and 160 mm Tektro rotors. Token wheels were good — light and responsive. What I didn't like was the poor freehub that had a lot of play (the angle of engagement was probably over 20 degrees, lol) and an overcomplicated bearing system, which led me to buy a new wheelset a year later. Always invest in a better part if you can swing it! For what they were worth, though, the wheels were fine — pretty true and fast-rolling (not that I could tell a slow-rolling wheel from a fast one, lol). Considering I got them secondhand with pre-installed tires and discs, and paid only 2200 DKK for them, I was happy with what I got.
INITIAL IMPRESSIONS AND FUTURE UPGRADES
Not much to say about the build other than it’s crazy fun. Narrow wheelbase provides a quick and agile bike. If you’ve ever ridden a 100mm stem roadbike and know how it feels - this is the exact opposite. Kind of. Shorter stem and narrower wheelbase but also rigid fork with thicker tires make for a very strange but satisfying combo. Bike is agile and quick. Wide handlebars give you a ton of confidence and ability to quickly and confidently maneuver your way in traffic. Narrow wheelbase does come with its share of down sides. There is the toe-overlap for example. Doing tight turns often results in rubbing between the front tire and your shoe. Put on some mudguards and you’re definitely gonna pay extra close attention to avoid tight turns. There is overall long-term comfort and speed. From what I know this bike is modeled after indoor bikes - with its steep headtube angles and whatnot. I imagine there’s a reason why big brands like Canyon and Rose Bikes opt for more relaxed headtube angles, as well as more clearance between the bottom bracket and the ground.
Having more ground clearance could give you the possibility to run longer cranks but for me it’s about the ability to strap water bottles to bellow the frame. I’ve tried and succeeded in strapping a 1l Nalgene bottle on the bottom tube but I would be very vary when going over obstacles as that thing would probably fall off. One of my big goals when building the bike was to have as much GRX components on there. No specific reason but I felt like it was what the bike needed. Mtb mech’s are great with the clutch and overall robustness but I don’t need the crazy ranges they’re made for. That’s why when I found a 2nd hand GRX 810 mech I jumped on the opportunity to convert the groupset from 11-40T to 11-34T. It just makes more sense given where the bike is mainly used - the city. I opted for SunRace’s all black cassette purely because I thought it looked cool, nothing more than that. Getting Shimano’s ultraglide Ultegra cassette would have probably resulted in better shifting performance.
"Narrow wheelbase does come with its share of down sides."
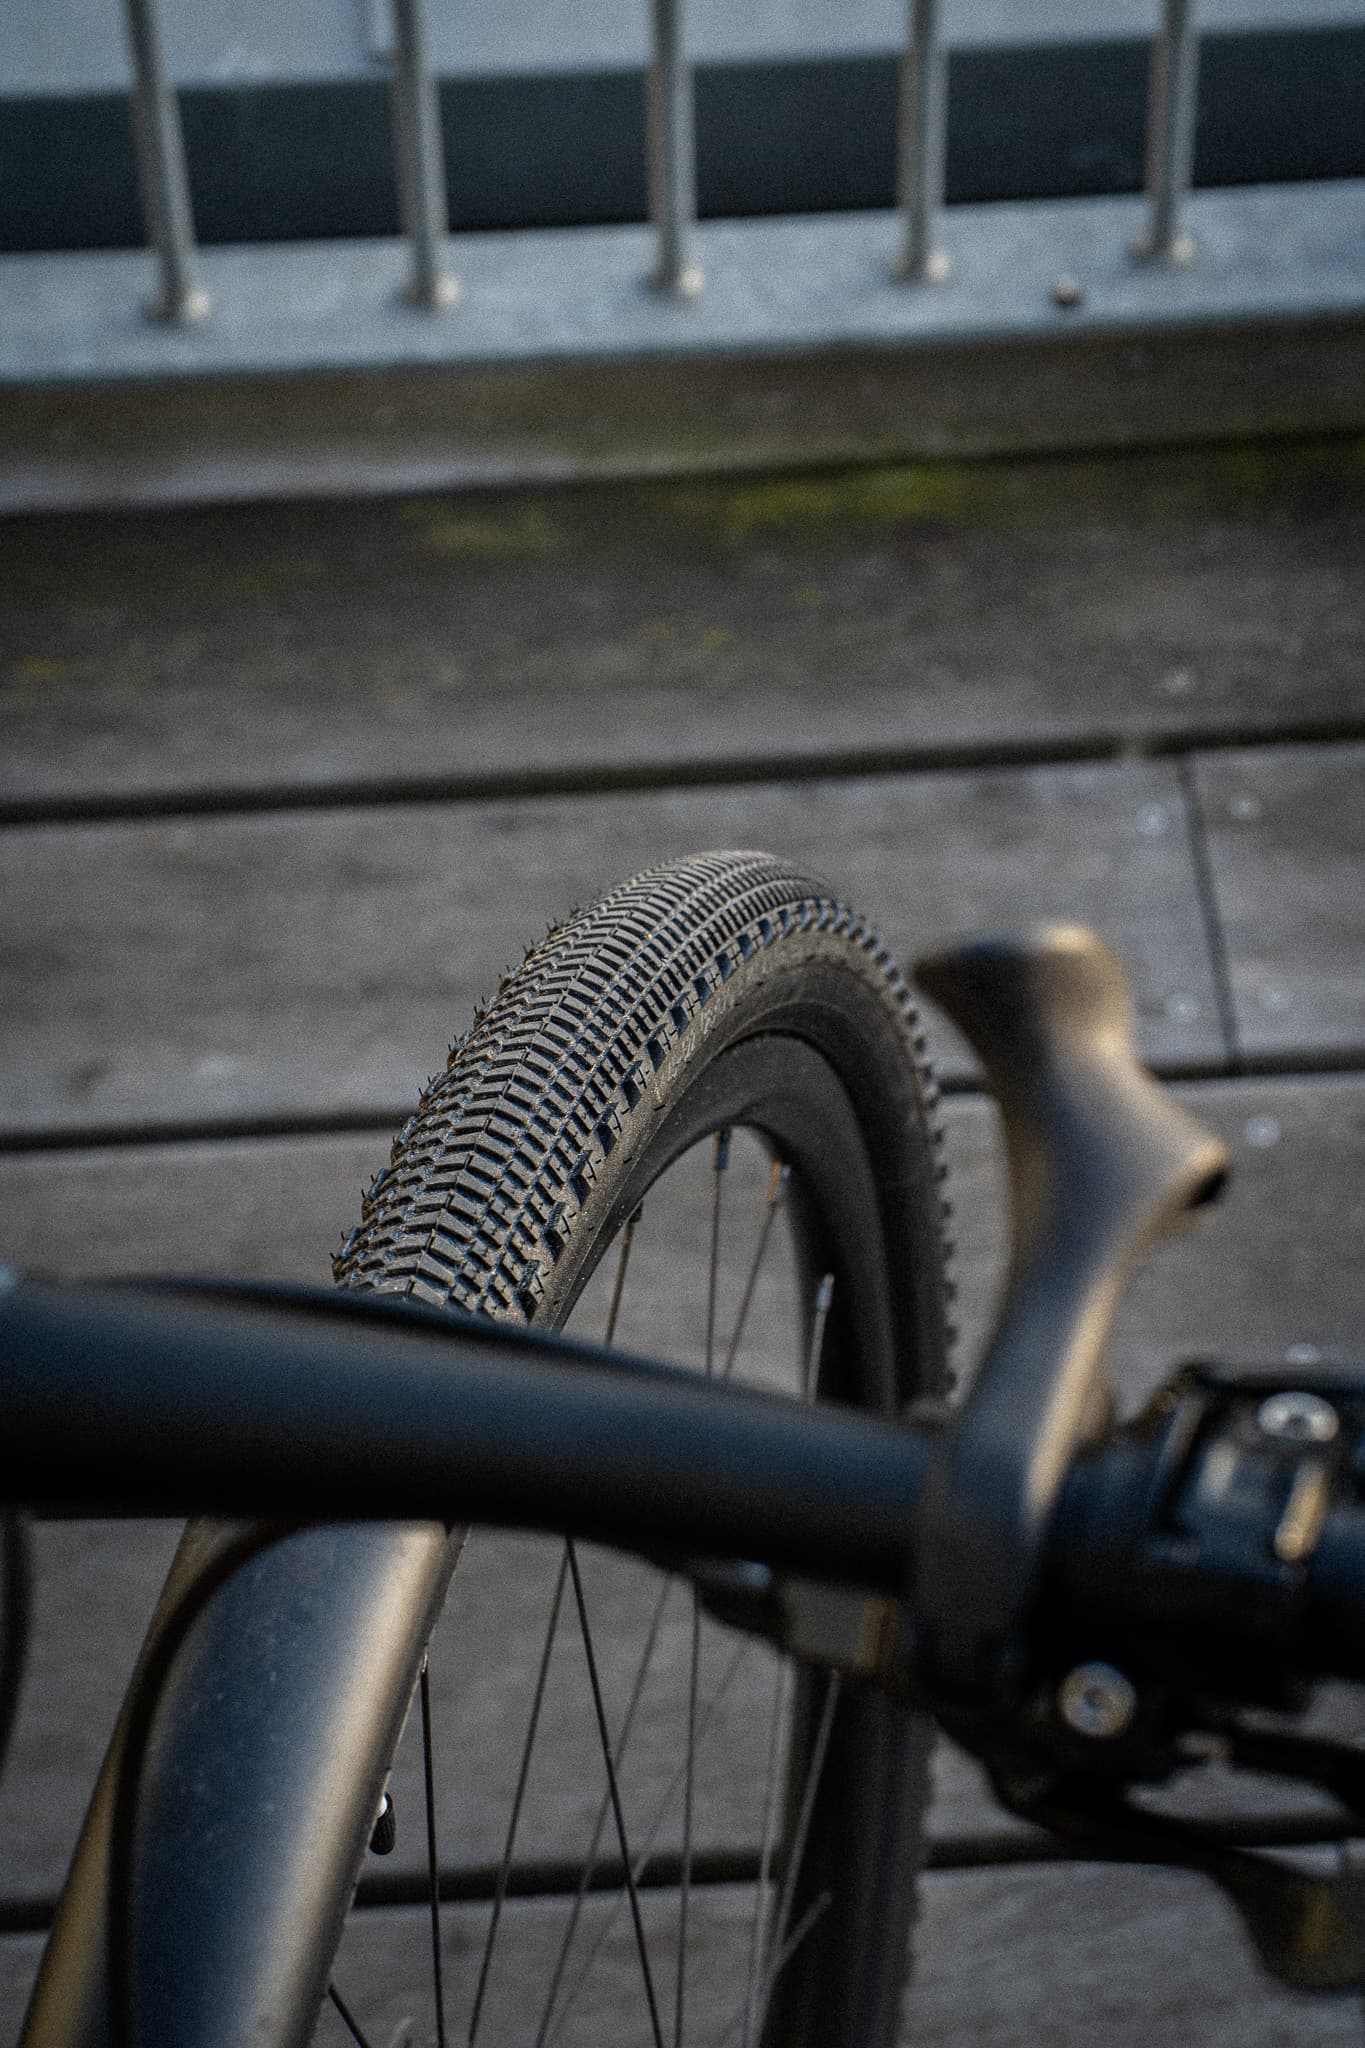
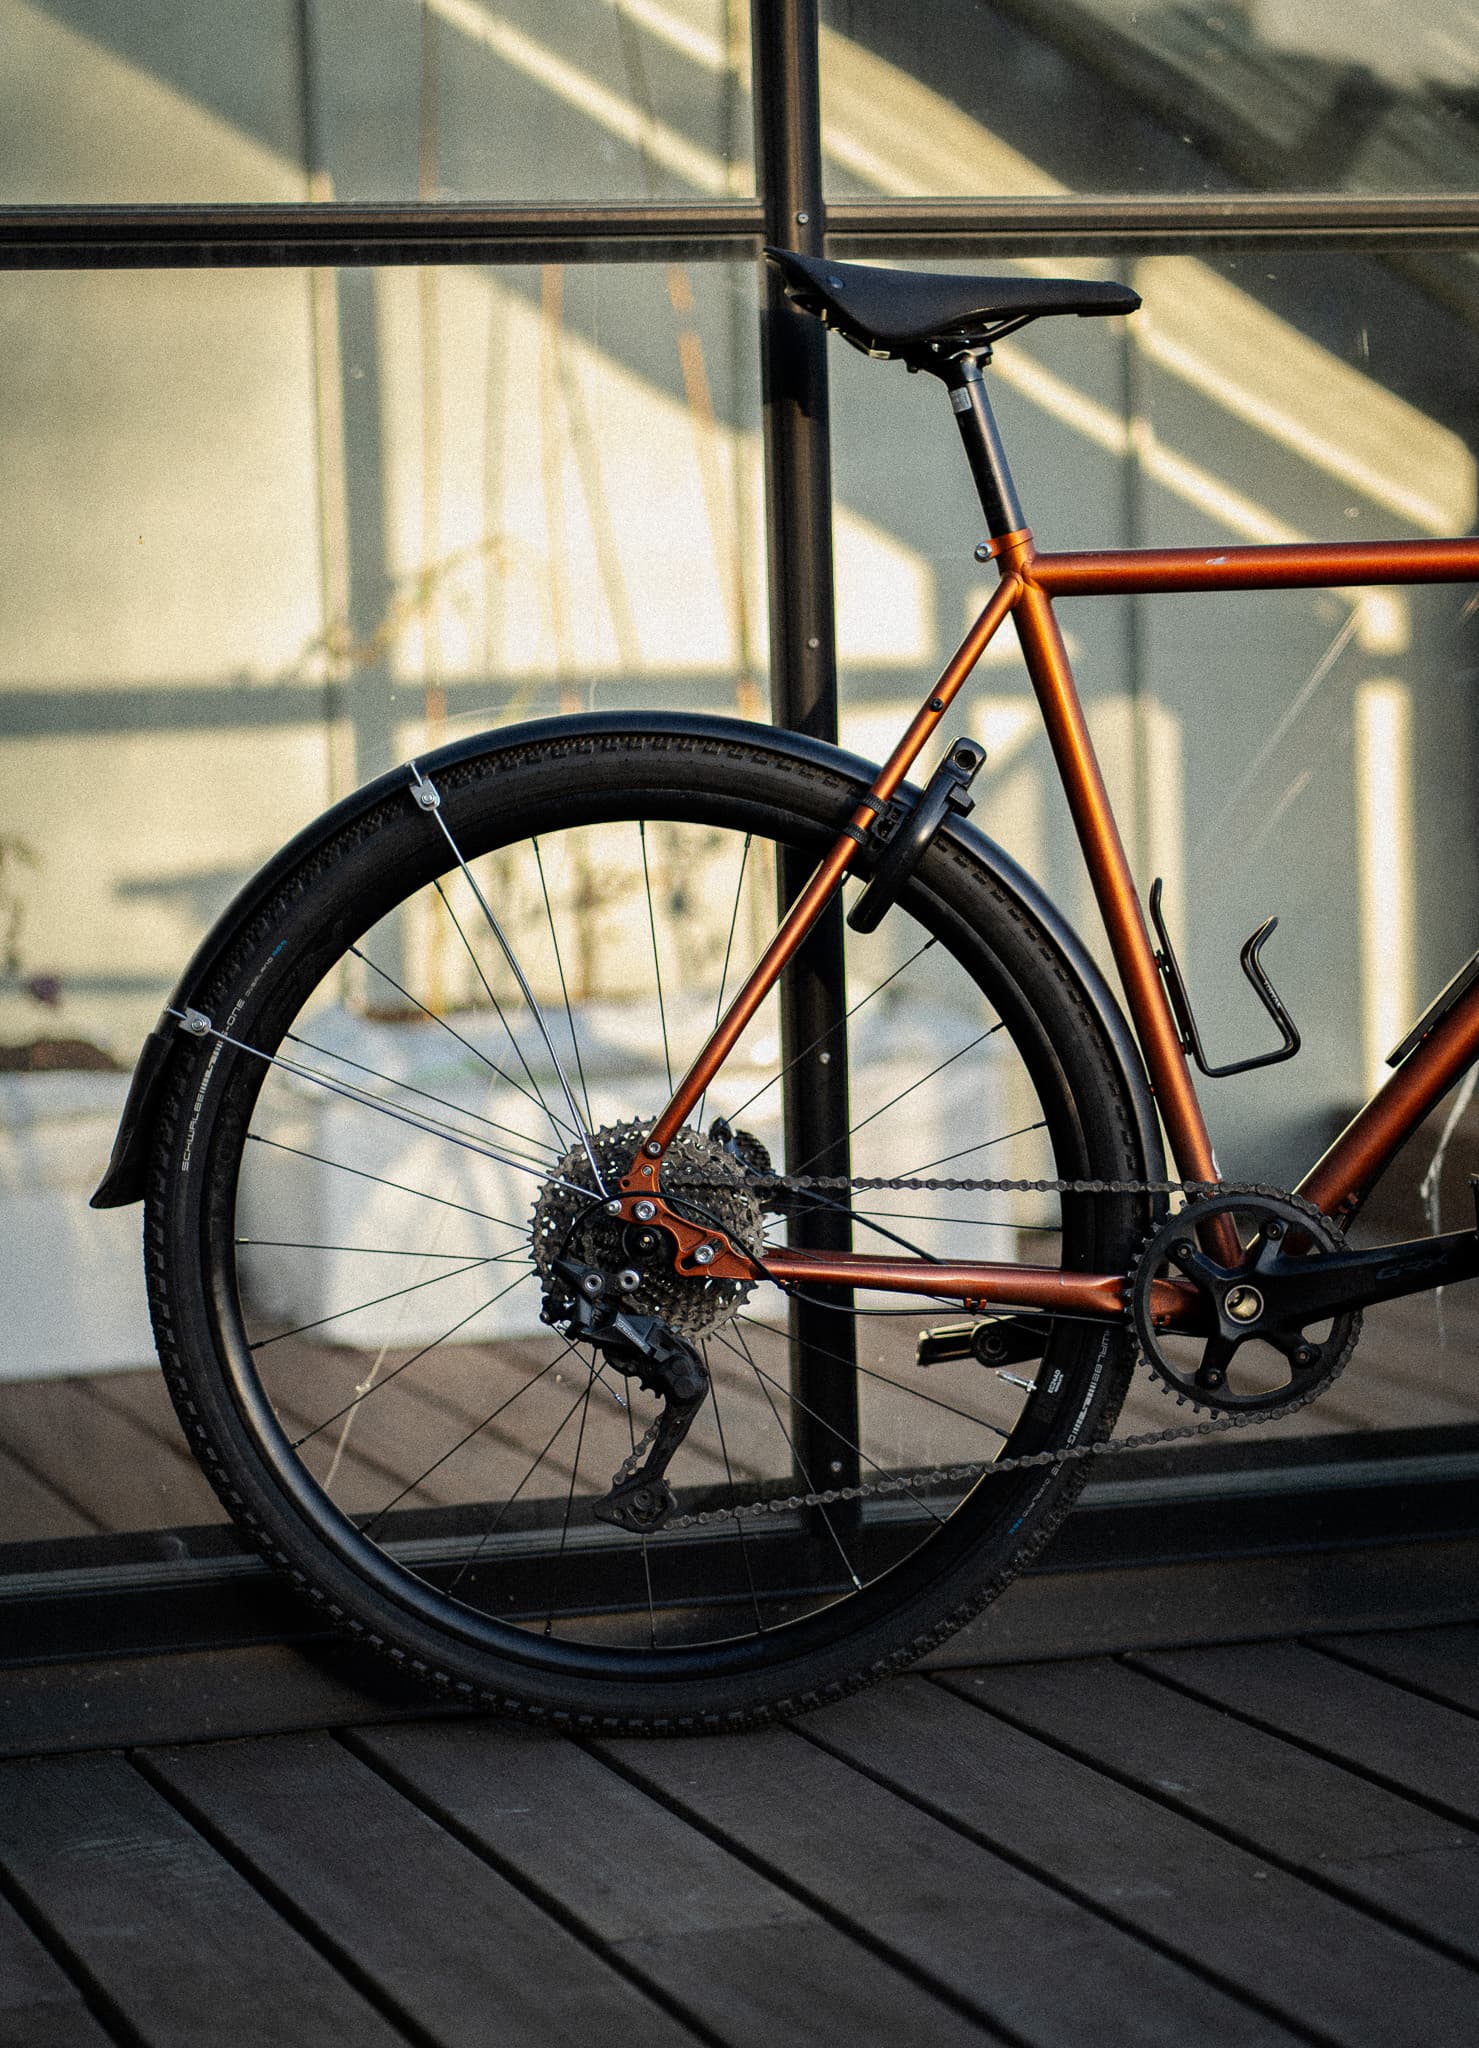
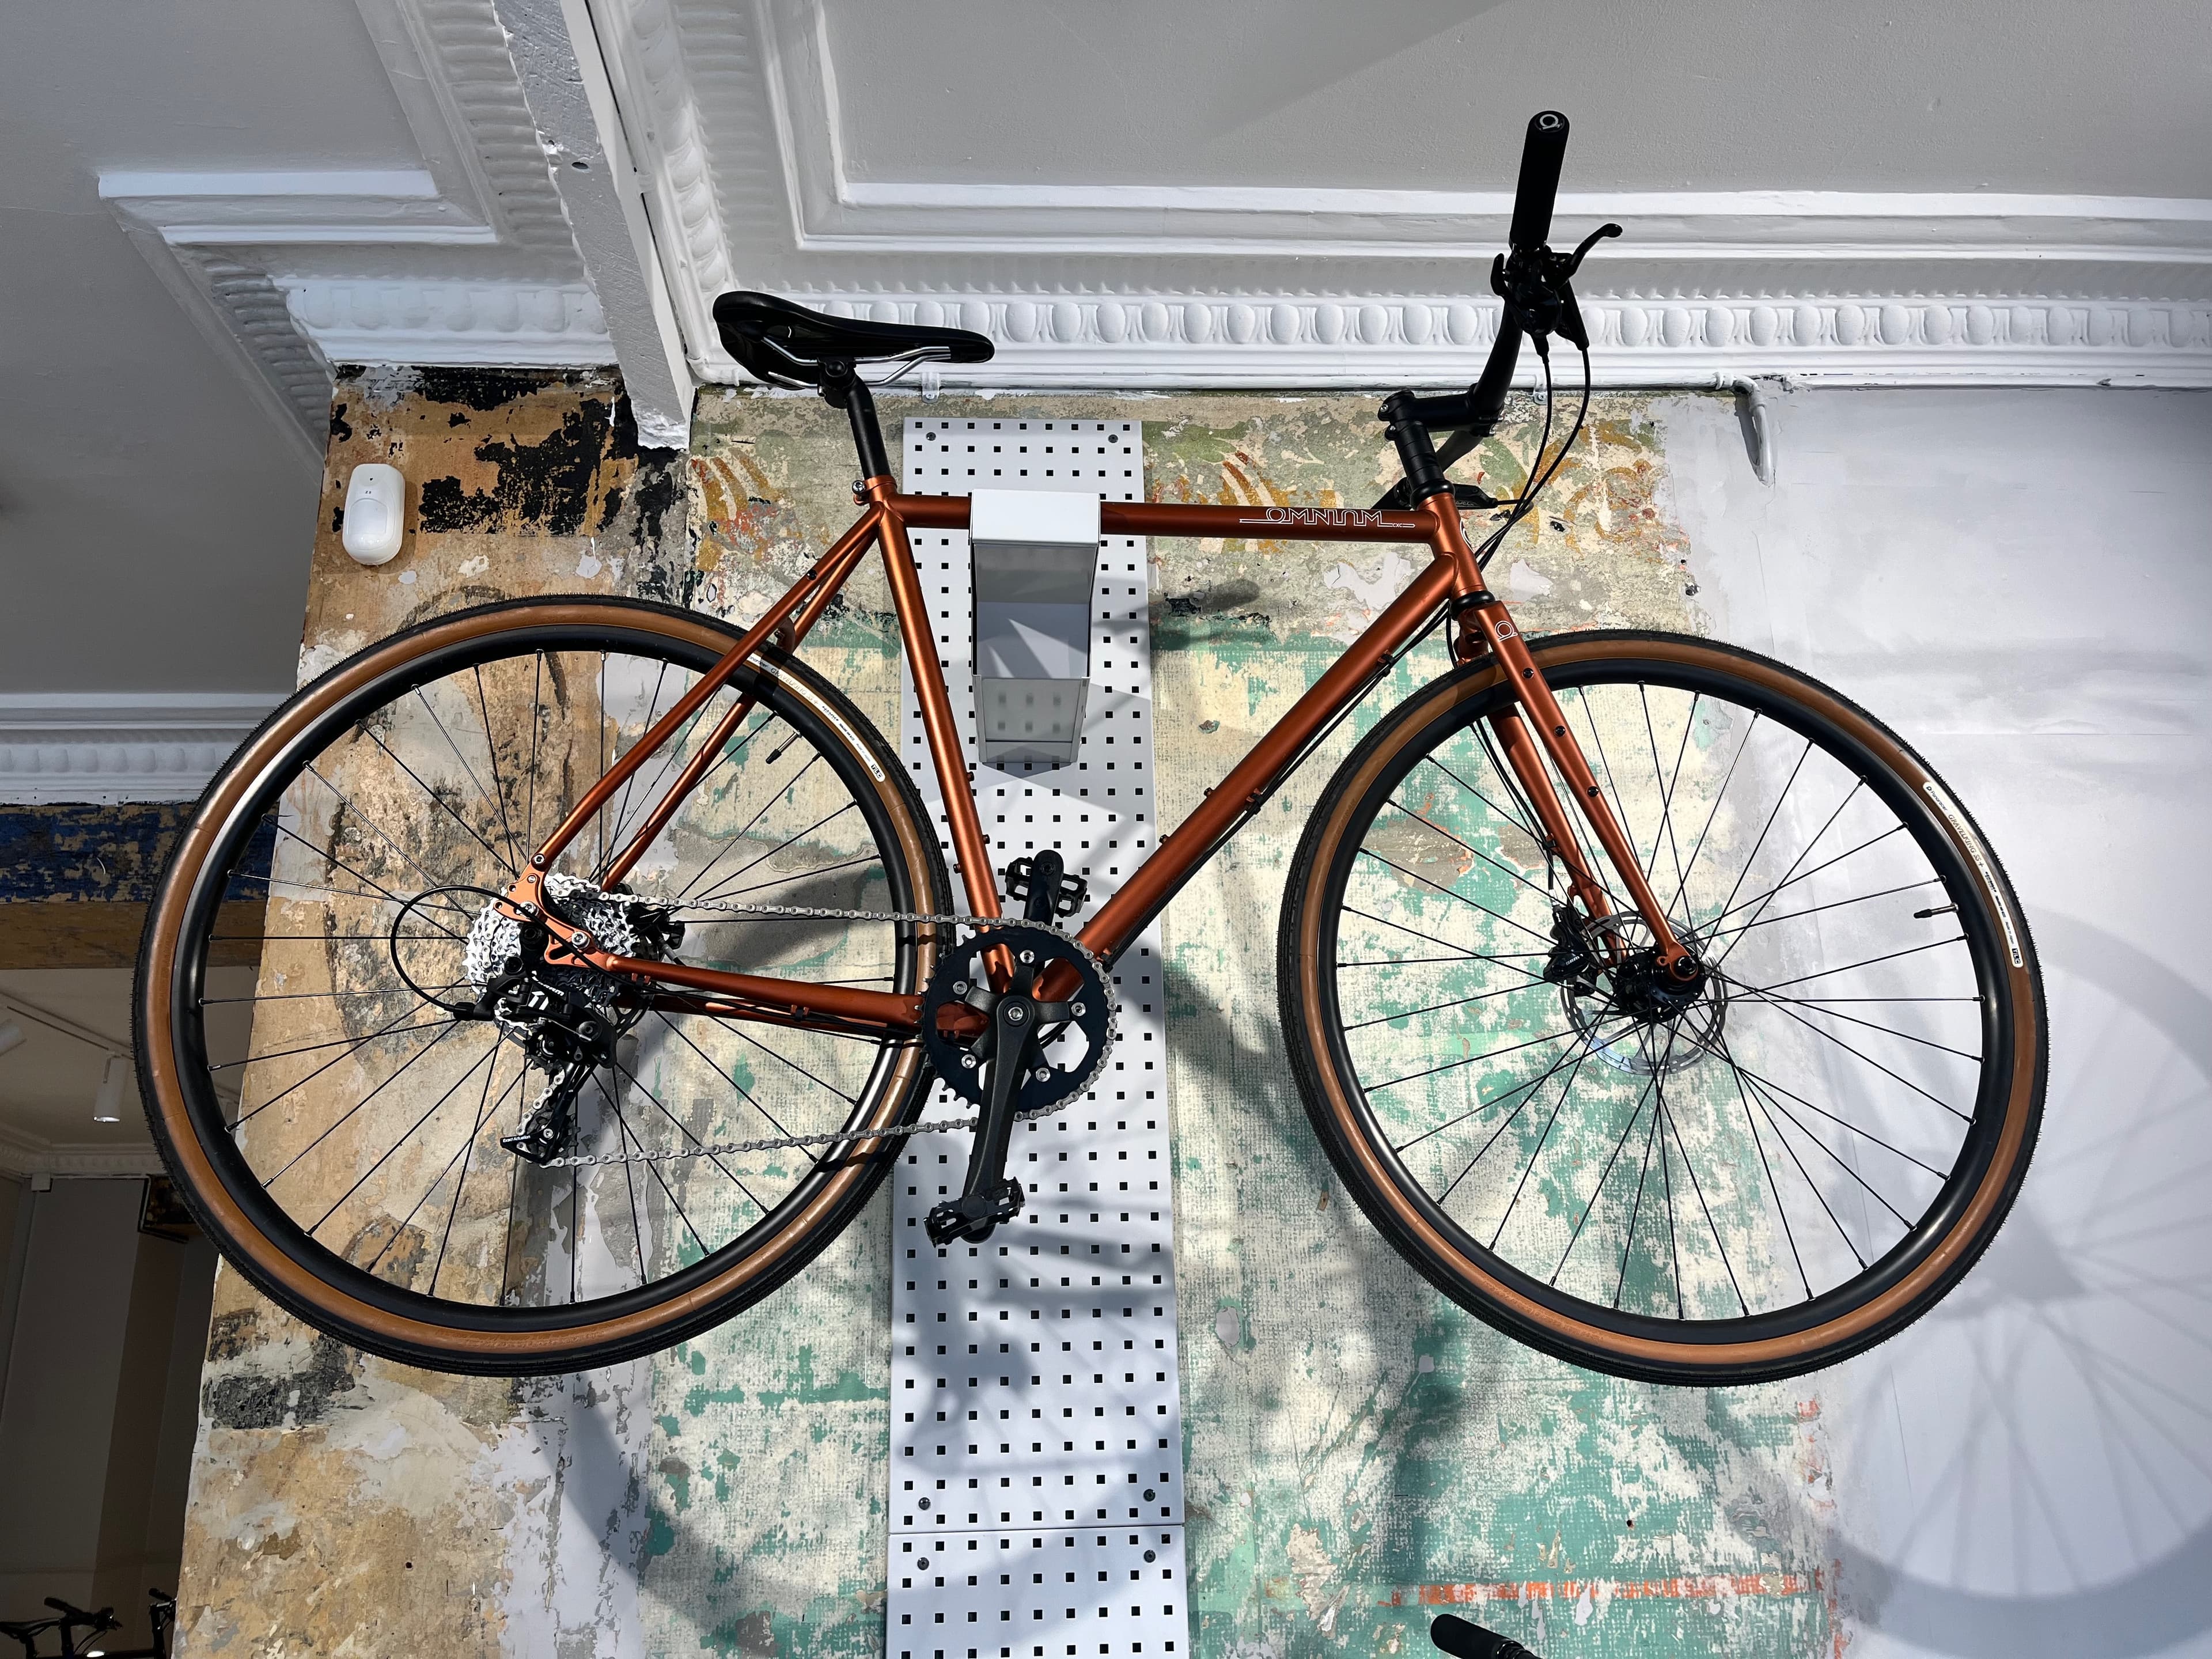
Here you can see my almost-current build — using the 5120 Deore mech, 11-40T cassette with 40T chainring, new Schwalbe G-One Overland 365 tires, and a C17s saddle.
CLOSING THOUGHTS
I understand that I've geeked out quite a bit on this one. So thanks for bearing with me. What to add here without sounding too philosophical? Building a bike is a nonstop process. It's more annoying, time-consuming, stressful, and energy-draining than buying one off the shelf. Would I have bought a finished CXC if it were on sale? No. The past year with the CXC has taught me just how fun building bikes really is. The process — with all of its highs and lows — is something you can't replicate. I imagine that if you're reading this article, you've probably done something similar or are thinking about doing something similar. I urge you to give it a shot. Mess up. Buy the wrong part. Buy the wrong tool. Over-torque a screw and break it in half. Put the tires on the wrong way. Forget to close the bleed port on your calipers and contaminate your discs and pads. Why? Because there isn’t a day I ride my bike without thinking about how much I love it. Prove me wrong — I dare you to find the same feeling from a pre-built bike.
Get to work and let me know how it goes! — Filip
COMPONENT LIST
| Component | Details |
|---|---|
| Handlebars | Ritchey Comp Flat Handlebar +/-5 710mm x +/-5mm x 5° |
| Trigger | SL-RS700 11-speed Flat Bar Shift Lever right |
| Grips | ESI Racers Edge |
| Wheels | HUNT 4 Season All Road Disc |
| Chain | KMC X11EL 11-speed Chain |
| Frame | Omnium CXC V3 Framekit Medium Copperhead |
| Saddle | Brooks Cambium C17s |
| Seatpost | misc |
| Crankset | Shimano GRX FC-RX600 1x11-speed Crankset 40T 172,5mm |
| Bottom Bracket | Shimano BB-RS501 BSA Hollowtech II |
| Rear Mech | Shimano GRX RD-RX810 11s |
| Cassette | SunRace CSRX11 11-speed Cassette 11-34 |
| Tires | G-One Overland 365 RG 28 TLE Addix Four Season E-50 Folding Tire 622 x 45 |
| Tires Setup | tubeless |
| Brakes | Shimano DEORE BR-M6100 |
| Rotors | 160mm/160mm front/rear |
| Headset | Omnium threadless headset 1-1/8" |
| Steam | Trek Bontrager 80mm |
| Handlebar Ergo Grips | CloseTheGap Ergo My Ride |
| Handlebar Bag | Omnium bag |
| Bottlecage Holders | Topeak |
Filip Malek. All rights reserved.
Built with Next.js and Tailwind CSS.